


Guía de instalación del cuadro de instrumentos digital para Volkswagen Golf Mk7: actualización paso a paso
Instalación del cuadro digital del Golf Mk7 / Mk7.5: qué comprobar primero
Esta guía cubre el Ruta de conversión de cuadro analógico MQB para Volkswagen Golf Mk7 / Mk7.5 en vehículos 2014–2020. Muestra la secuencia real de instalación: confirmar el tipo de cuadro original, retirar el embellecedor del salpicadero, retirar el cuadro de instrumentos original, completar el traslado necesario en banco, reinstalar el cuadro digital mejorado y verificar los datos del vehículo antes de cerrar por completo el salpicadero.
La comprobación de compatibilidad más importante es la arquitectura del cuadro de instrumentos original, no solo la insignia del modelo. Si el vehículo ya tiene un cockpit digital de fábrica, o si el salpicadero o el cuadro se han modificado previamente, confirme la ruta correcta antes del desmontaje.
Compatibilidad antes de la instalación
Ruta de instalación correcta
Utilice esta guía cuando el vehículo sea un Volkswagen Golf Mk7 o Mk7.5 sobre la plataforma MQB, años de modelo 2014–2020, con el cuadro de instrumentos analógico mecánico original.
Las aplicaciones compatibles pueden incluir variantes R-Line, GTI, GTE y Golf R, así como vehículos con volante a la izquierda y a la derecha, cuando la arquitectura del cuadro original coincida con la ruta de conversión compatible.
No utilice esta ruta cuando
- El vehículo ya tiene un cockpit digital de fábrica.
- El cuadro de instrumentos original ha sido modificado sustancialmente.
- La electrónica de posventa ha cambiado el cableado o la ruta de datos del cuadro.
- La disposición del cuadro original no coincide con la ruta de conversión de analógico a digital compatible.
Antes de realizar el pedido, envíe fotos claras del cuadro de instrumentos original y del salpicadero para que la ruta de hardware pueda comprobarse con el vehículo real.
Límites de la instalación del cuadro digital del Golf Mk7
- No se requiere taladrado en la ruta de instalación estándar compatible.
- No se requiere cortar cables.
- No se requiere flasheo ni codificación de la ECU en la ruta de instalación estándar.
- Los datos originales del vehículo no se modifican manualmente como parte de la instalación.
- Los componentes requeridos del cuadro original deben transferirse correctamente.
- La ruta del zumbador o altavoz del cuadro original debe permanecer correctamente instalada.
Esta instalación del cuadro digital del Volkswagen Golf Mk7 no es simplemente un cambio de carcasa exterior. El cuadro original se retira del vehículo y se abre en un banco de trabajo limpio para que los componentes internos necesarios puedan transferirse al conjunto del cuadro digital mejorado.
Reglas de seguridad antes de empezar
Proteja el embellecedor del salpicadero
Utilice herramientas de desmontaje no metálicas y suelte el embellecedor de forma progresiva. Es más probable que se produzcan daños estéticos cuando el embellecedor del salpicadero se fuerza o se retira con demasiada rapidez.
Descargue la electricidad estática antes de manipular la PCB
Antes de tocar las placas de circuito internas, descargue la electricidad estática del cuerpo. Sujete la PCB por los bordes y evite tocar directamente los componentes electrónicos pequeños.
Mantenga instalado el zumbador original
No retire ni pierda el zumbador o altavoz original del cuadro. Debe permanecer correctamente instalado durante la conversión.
Nunca presione la pantalla LCD
Sujete la carcasa desde el marco exterior durante el montaje. No empuje contra la superficie de la pantalla LCD para forzar el cierre de la carcasa.
Instalación paso a paso del cuadro digital Golf Mk7 / Mk7.5
La siguiente secuencia se basa en la ruta de instalación real del Golf Mk7. Complete primero la etapa de desmontaje del salpicadero y, a continuación, traslade el cuadro original a un banco de trabajo limpio para el traslado interno.
Confirme la línea base del cuadro analógico original
Antes del desmontaje, confirme que el coche todavía utiliza el cuadro de instrumentos mecánico original. Esta guía no está destinada a vehículos que ya estén equipados con un cockpit digital de fábrica.
Cuadro de instrumentos analógico original del Golf Mk7 antes de que comience la conversión al cuadro digital.
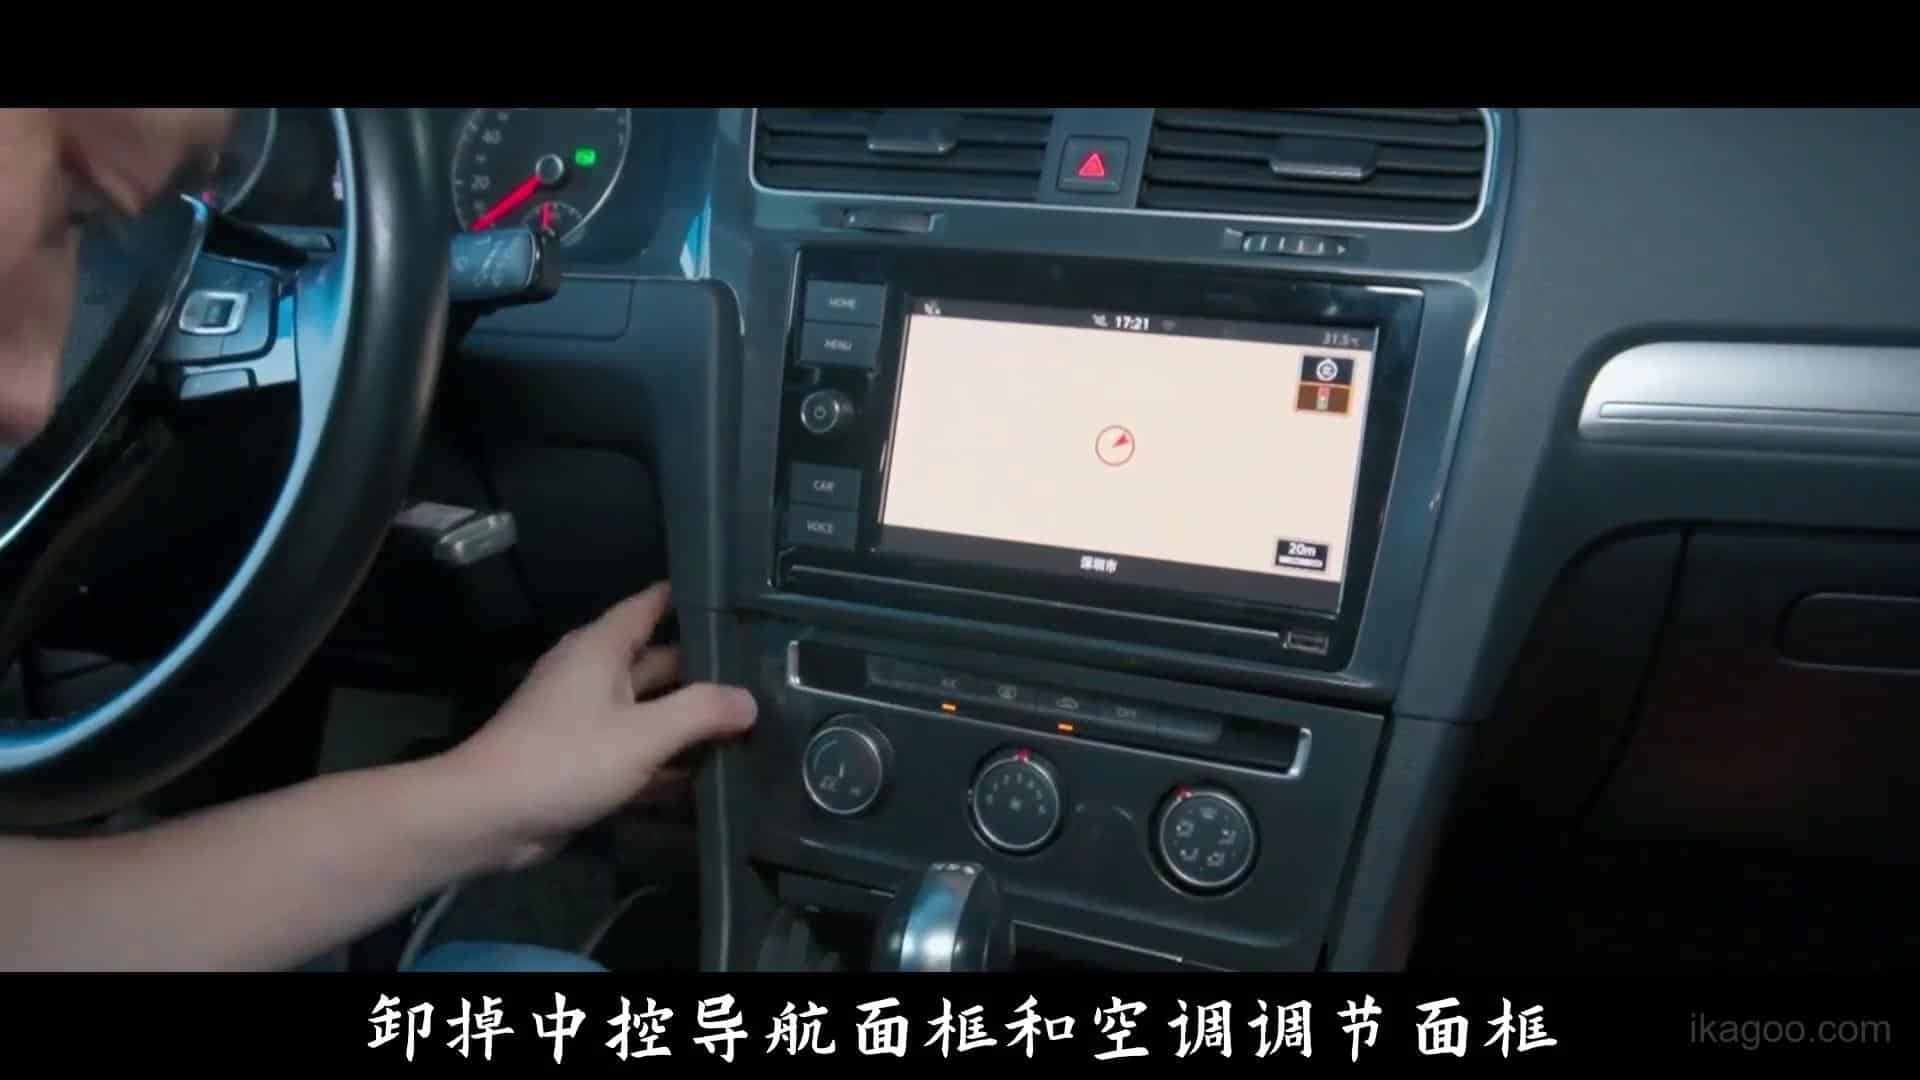
Comience a soltar el embellecedor junto a la zona del cuadro
Utilice una herramienta de desmontaje no metálica y suelte progresivamente el embellecedor del salpicadero circundante en lugar de levantar una esquina de forma agresiva.
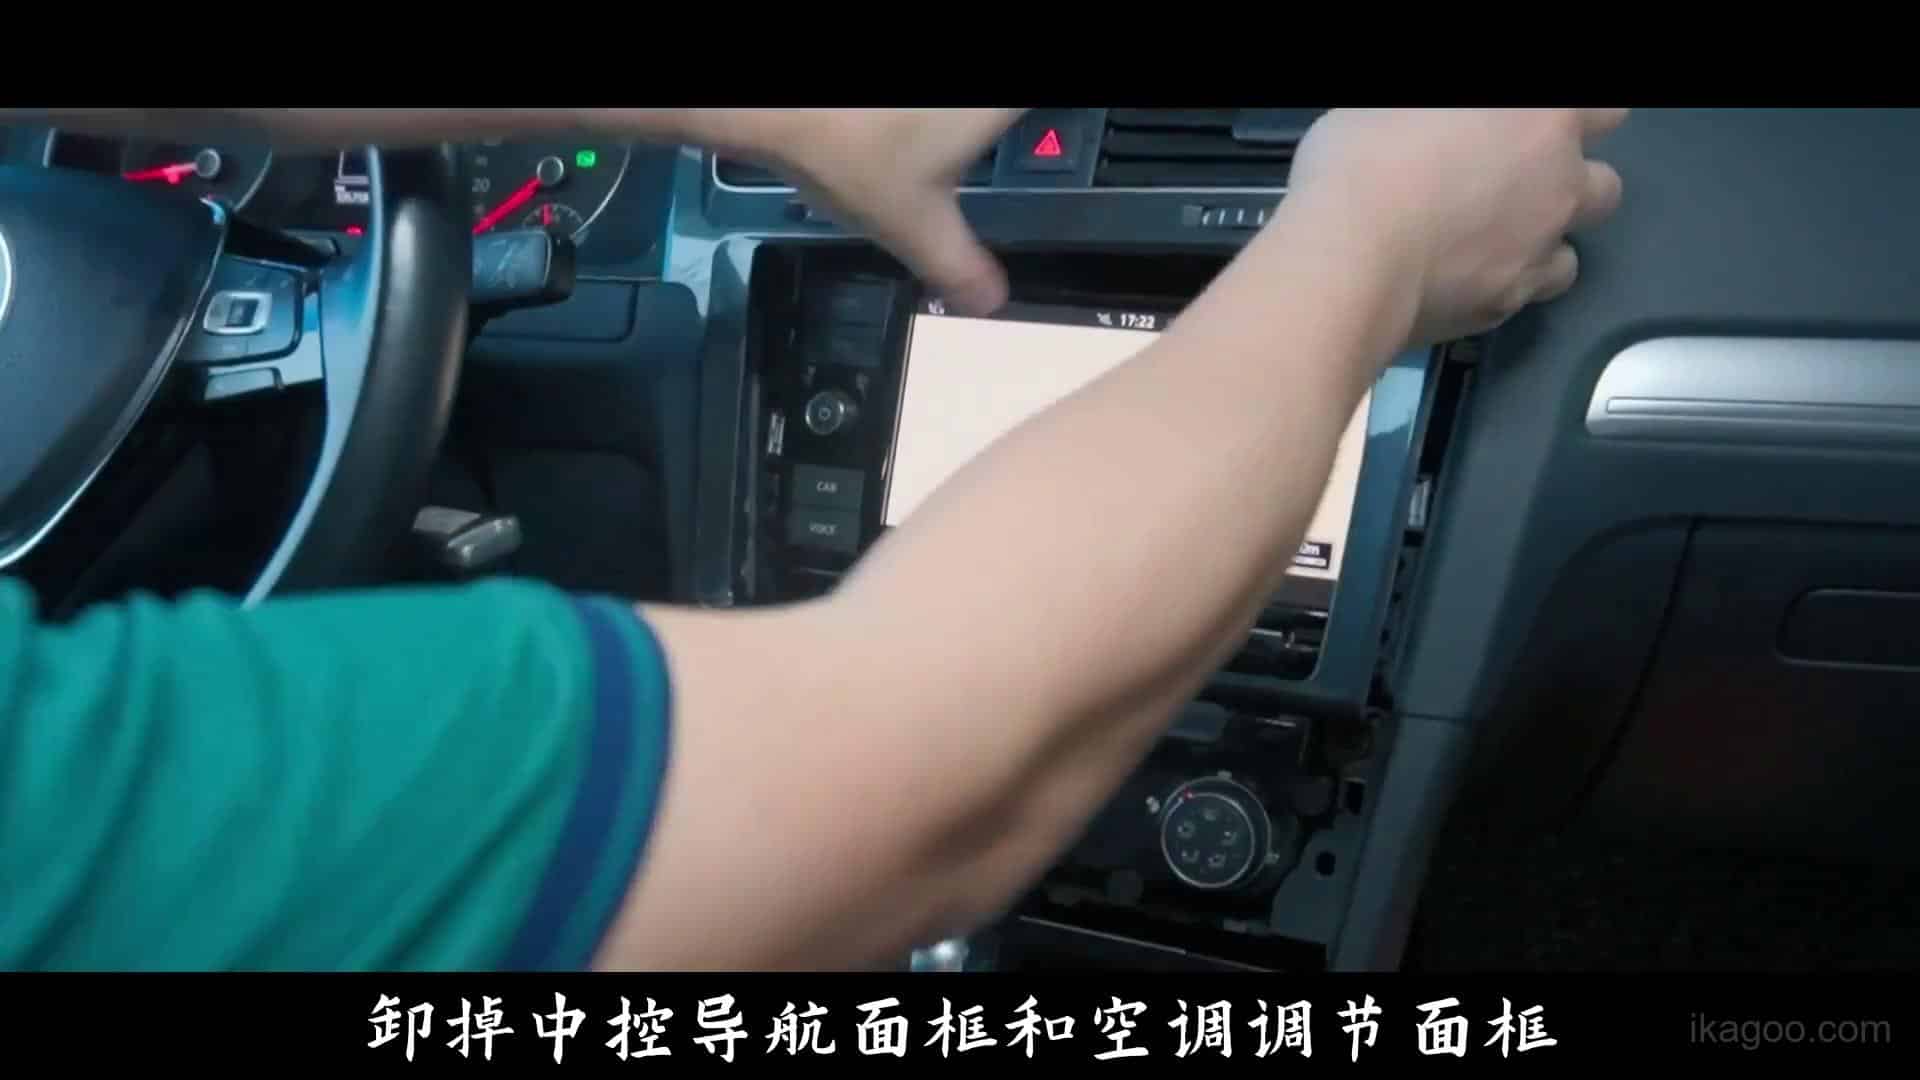
Continúe abriendo la ruta del embellecedor lateral del cuadro
Suelte suficiente embellecedor circundante para exponer la ruta de extracción del cuadro de instrumentos sin forzar el bisel del salpicadero.
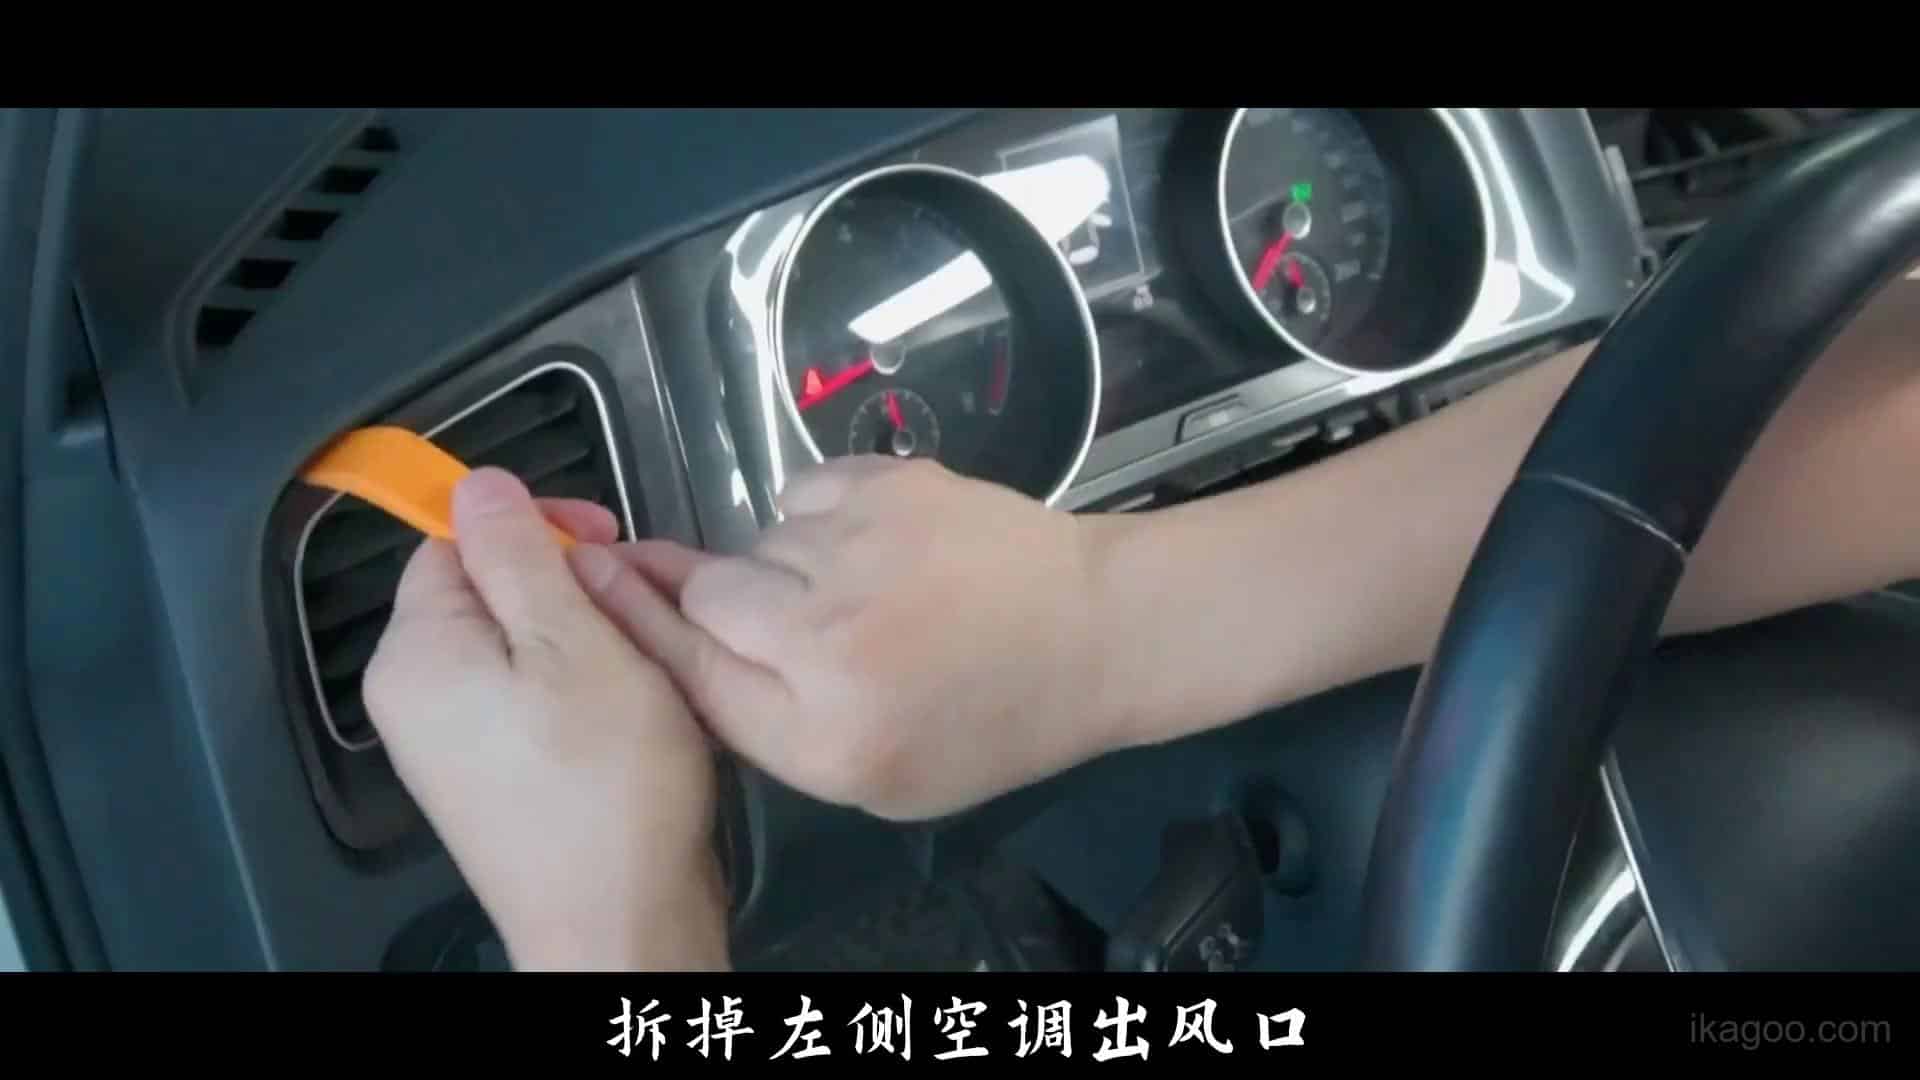
Retire el embellecedor de la rejilla lateral
Abra completamente la zona de la rejilla para que el marco del cuadro pueda soltarse limpiamente. Si el embellecedor sigue bloqueado, no fuerce el cuadro hacia fuera.
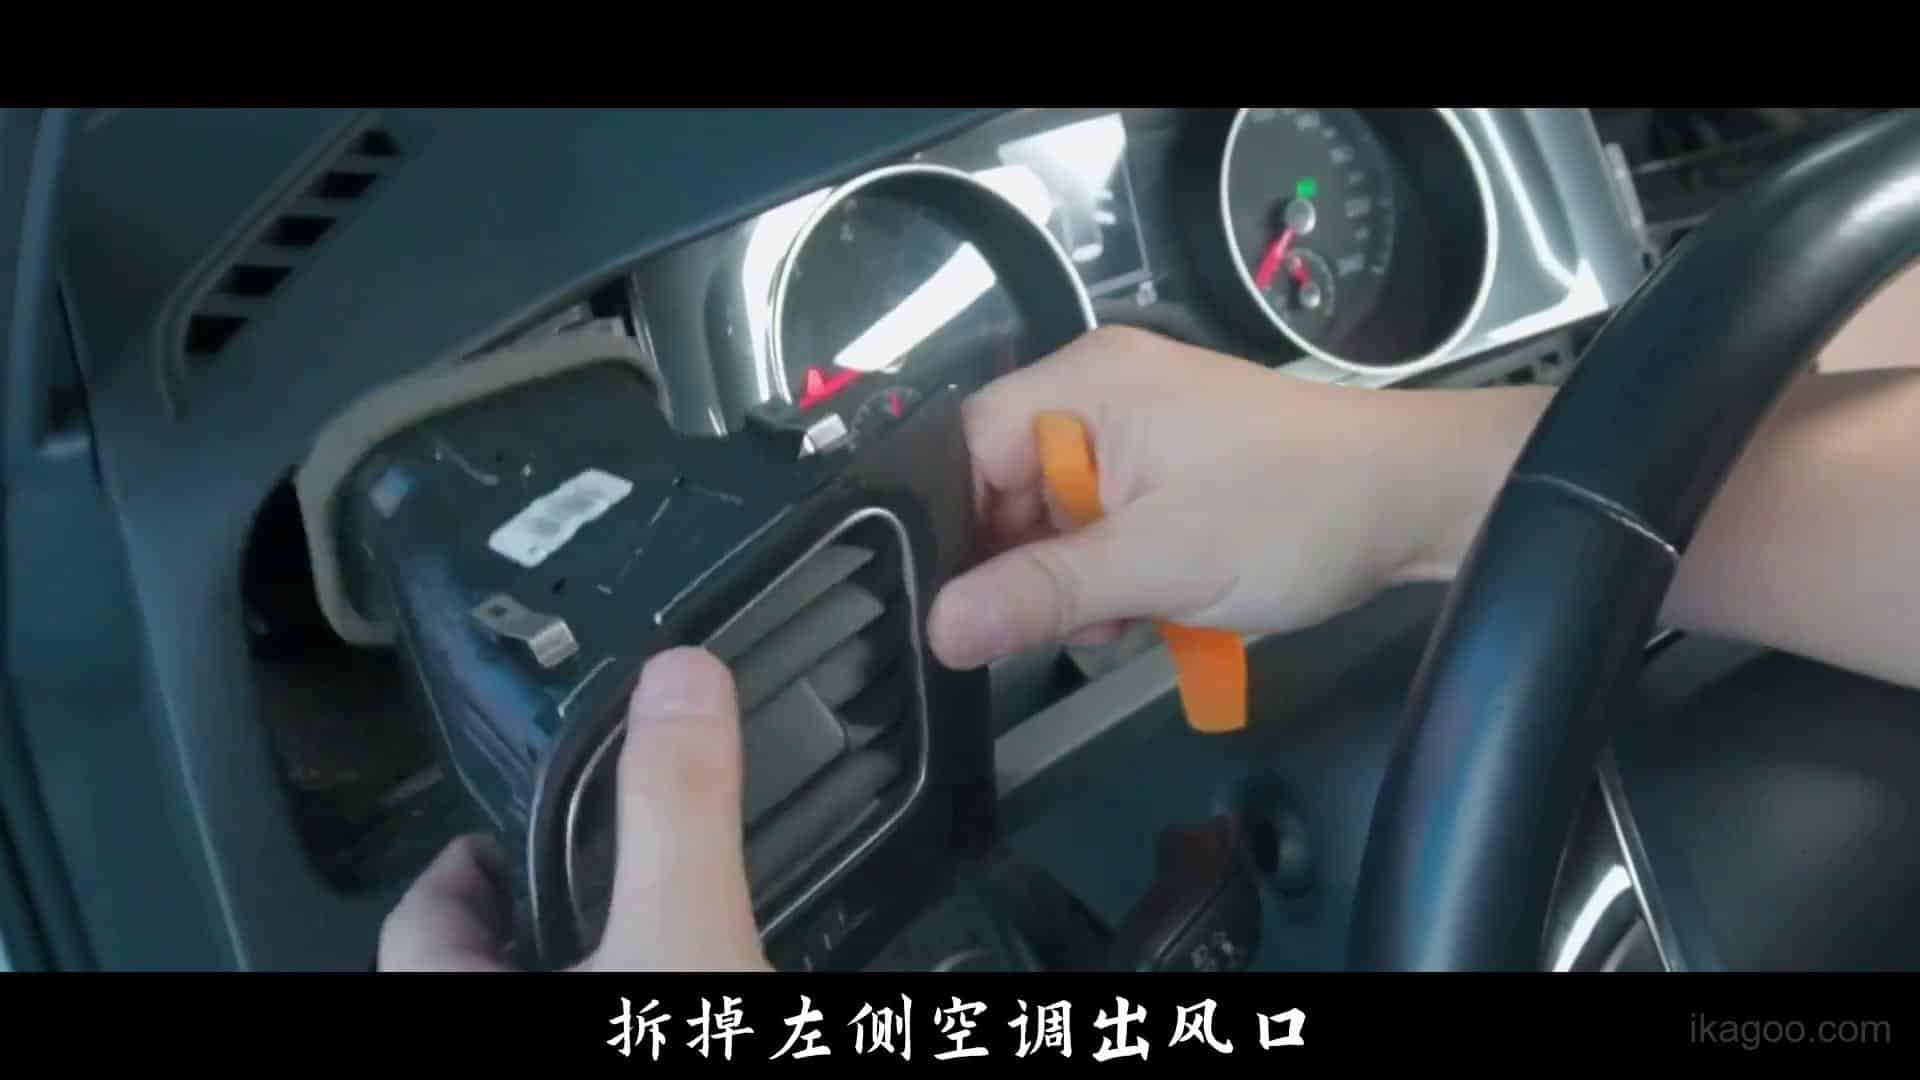
Suelte el marco superior del cuadro
Continúe abriendo la visera del salpicadero y el marco del cuadro de instrumentos. Aplique presión solo a la estructura del embellecedor, no a la lente del cuadro ni a la zona de la pantalla.
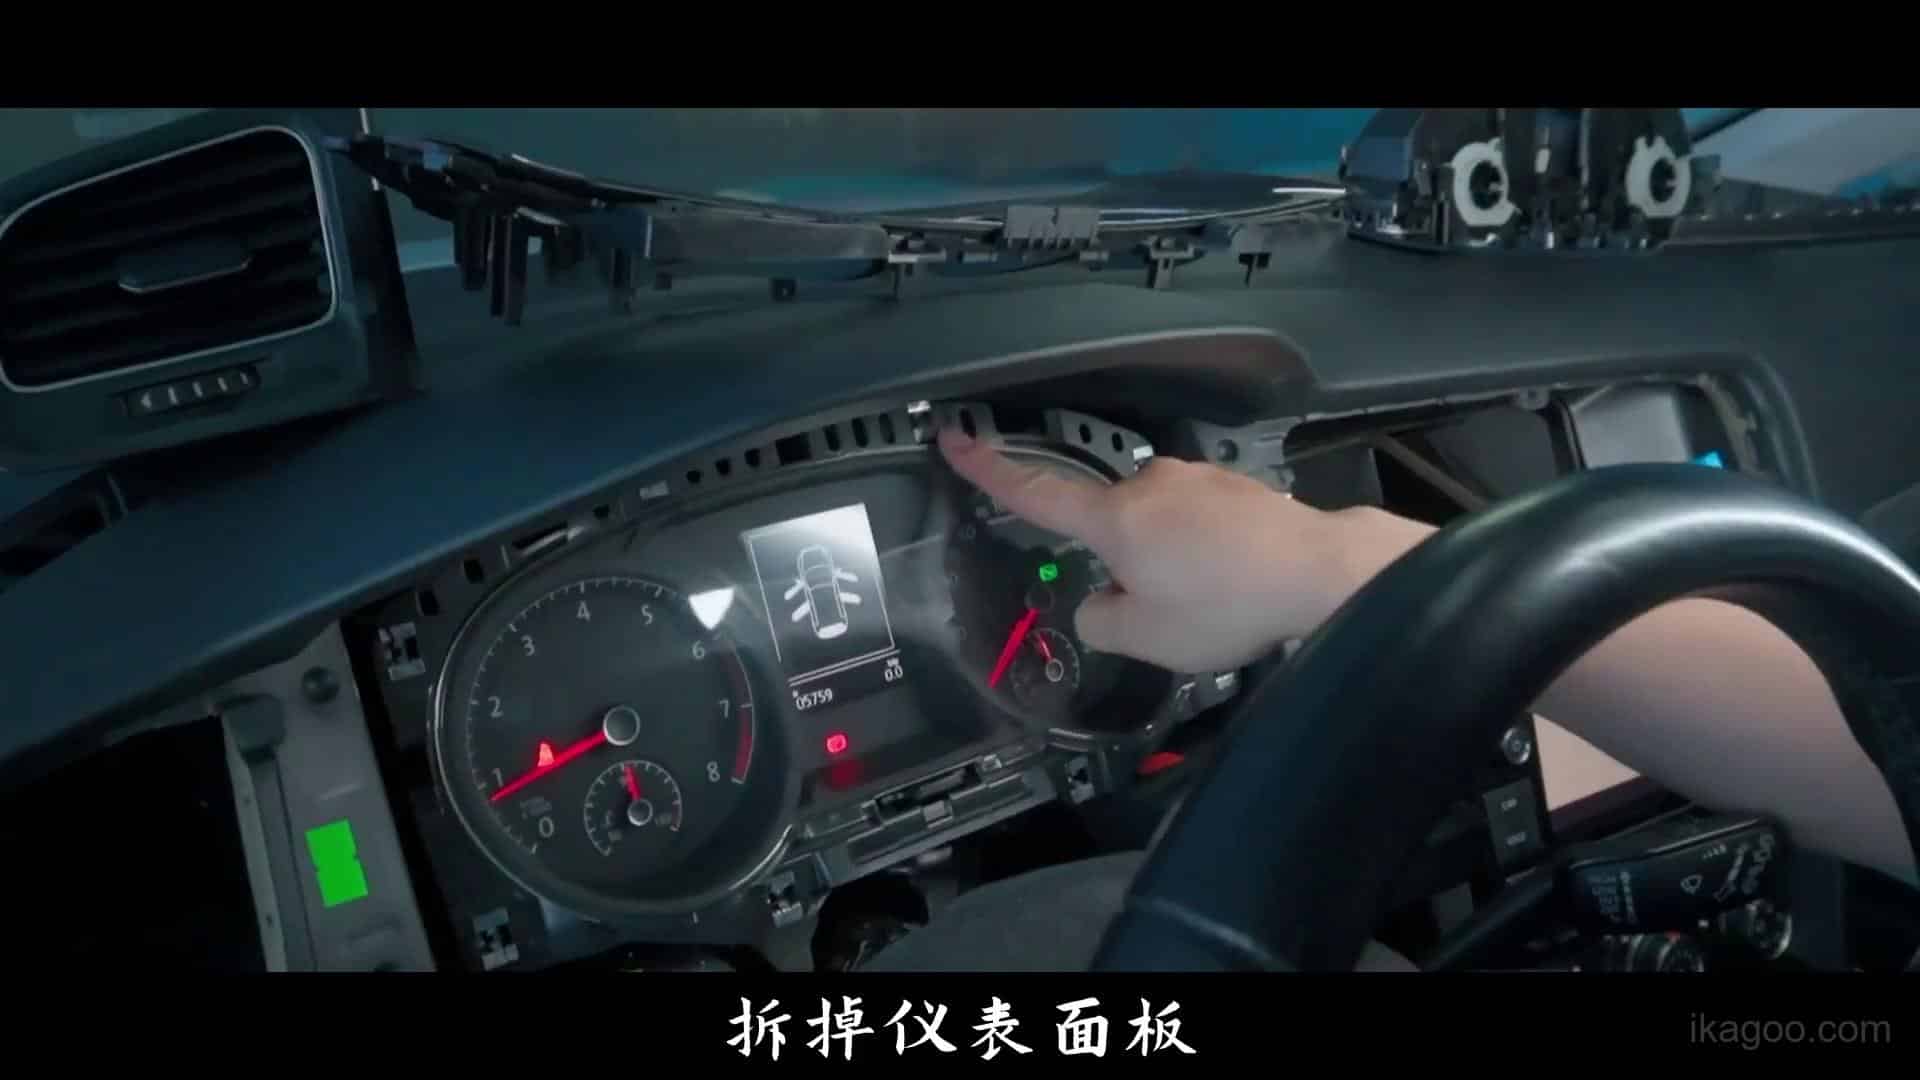
Tire del cuadro de instrumentos original hacia delante
Una vez que la ruta del embellecedor esté despejada, lleve con cuidado el cuadro original hacia delante desde la abertura del salpicadero.
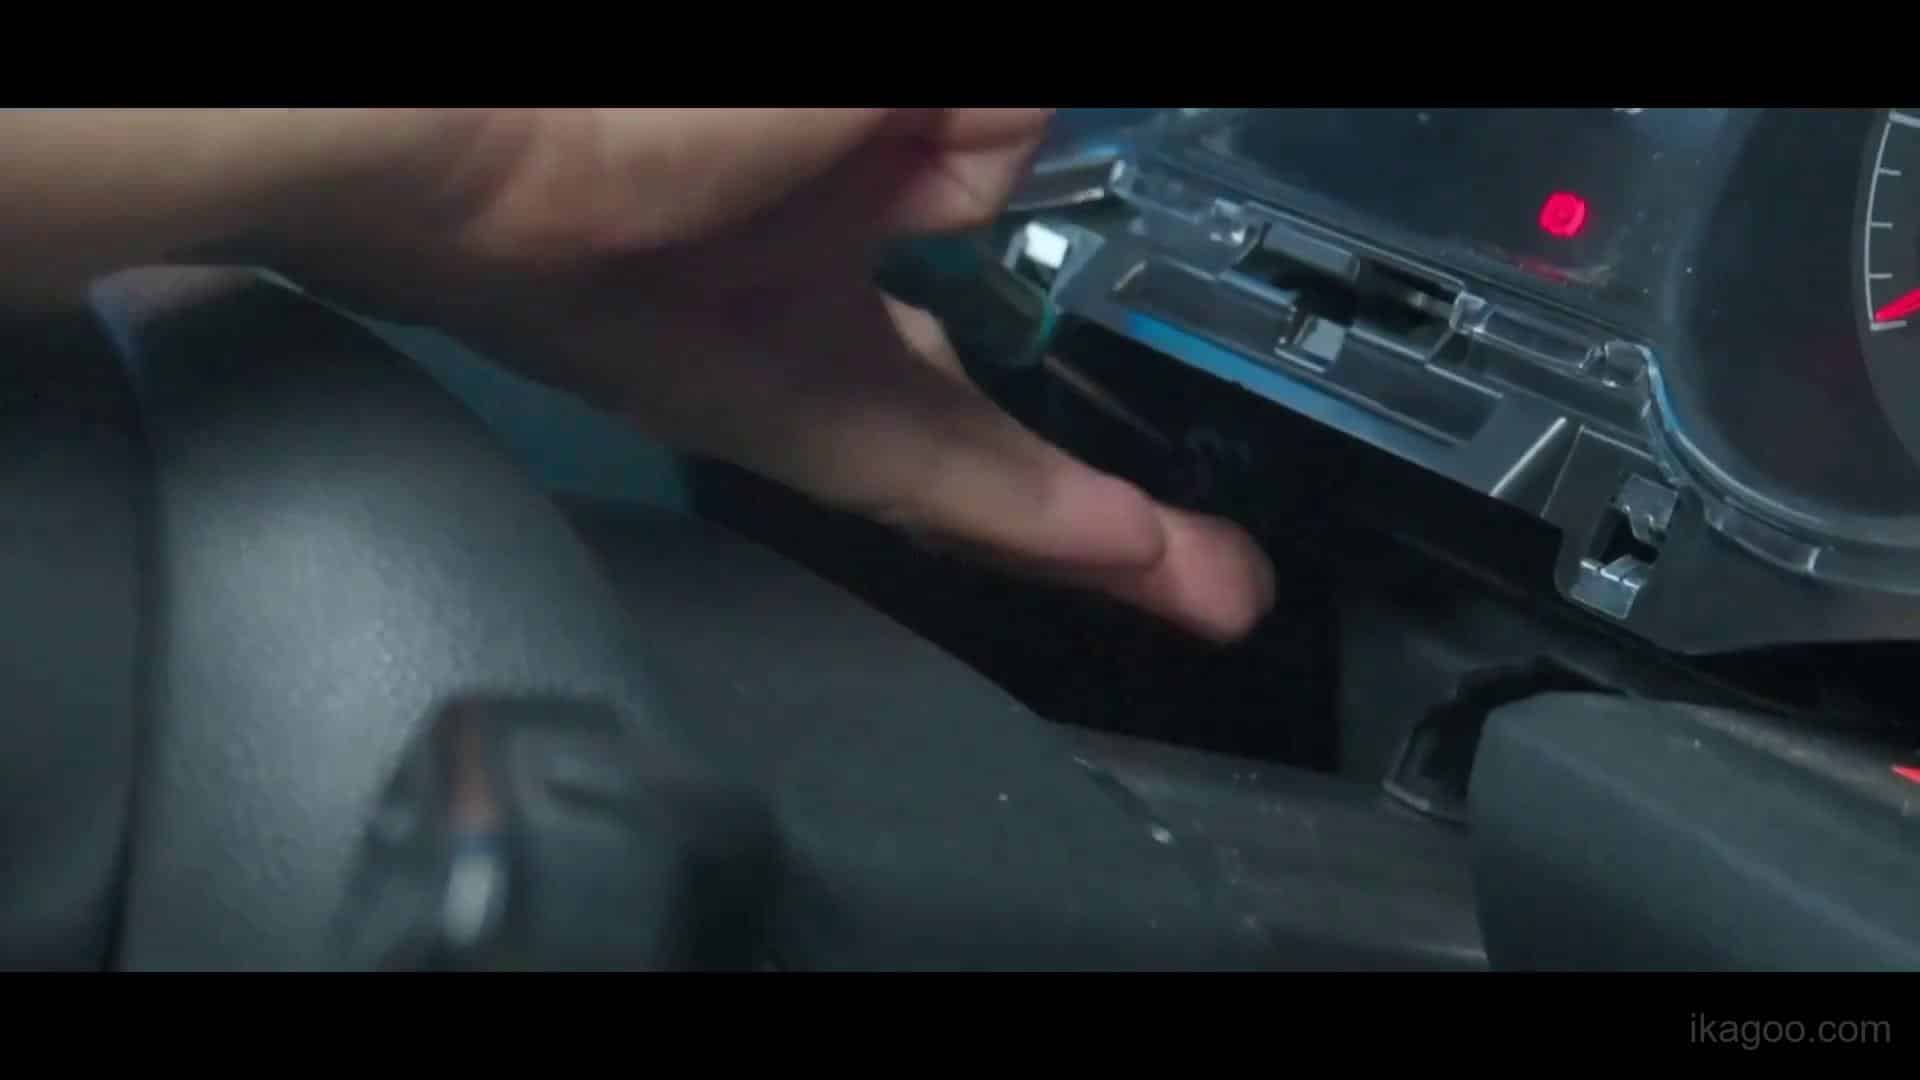
Traslade el cuadro a un banco de trabajo limpio
No realice la conversión interna mientras el cuadro cuelga dentro del salpicadero. Utilice una superficie de trabajo limpia y protegida contra estática y organice con cuidado los tornillos y los componentes pequeños.
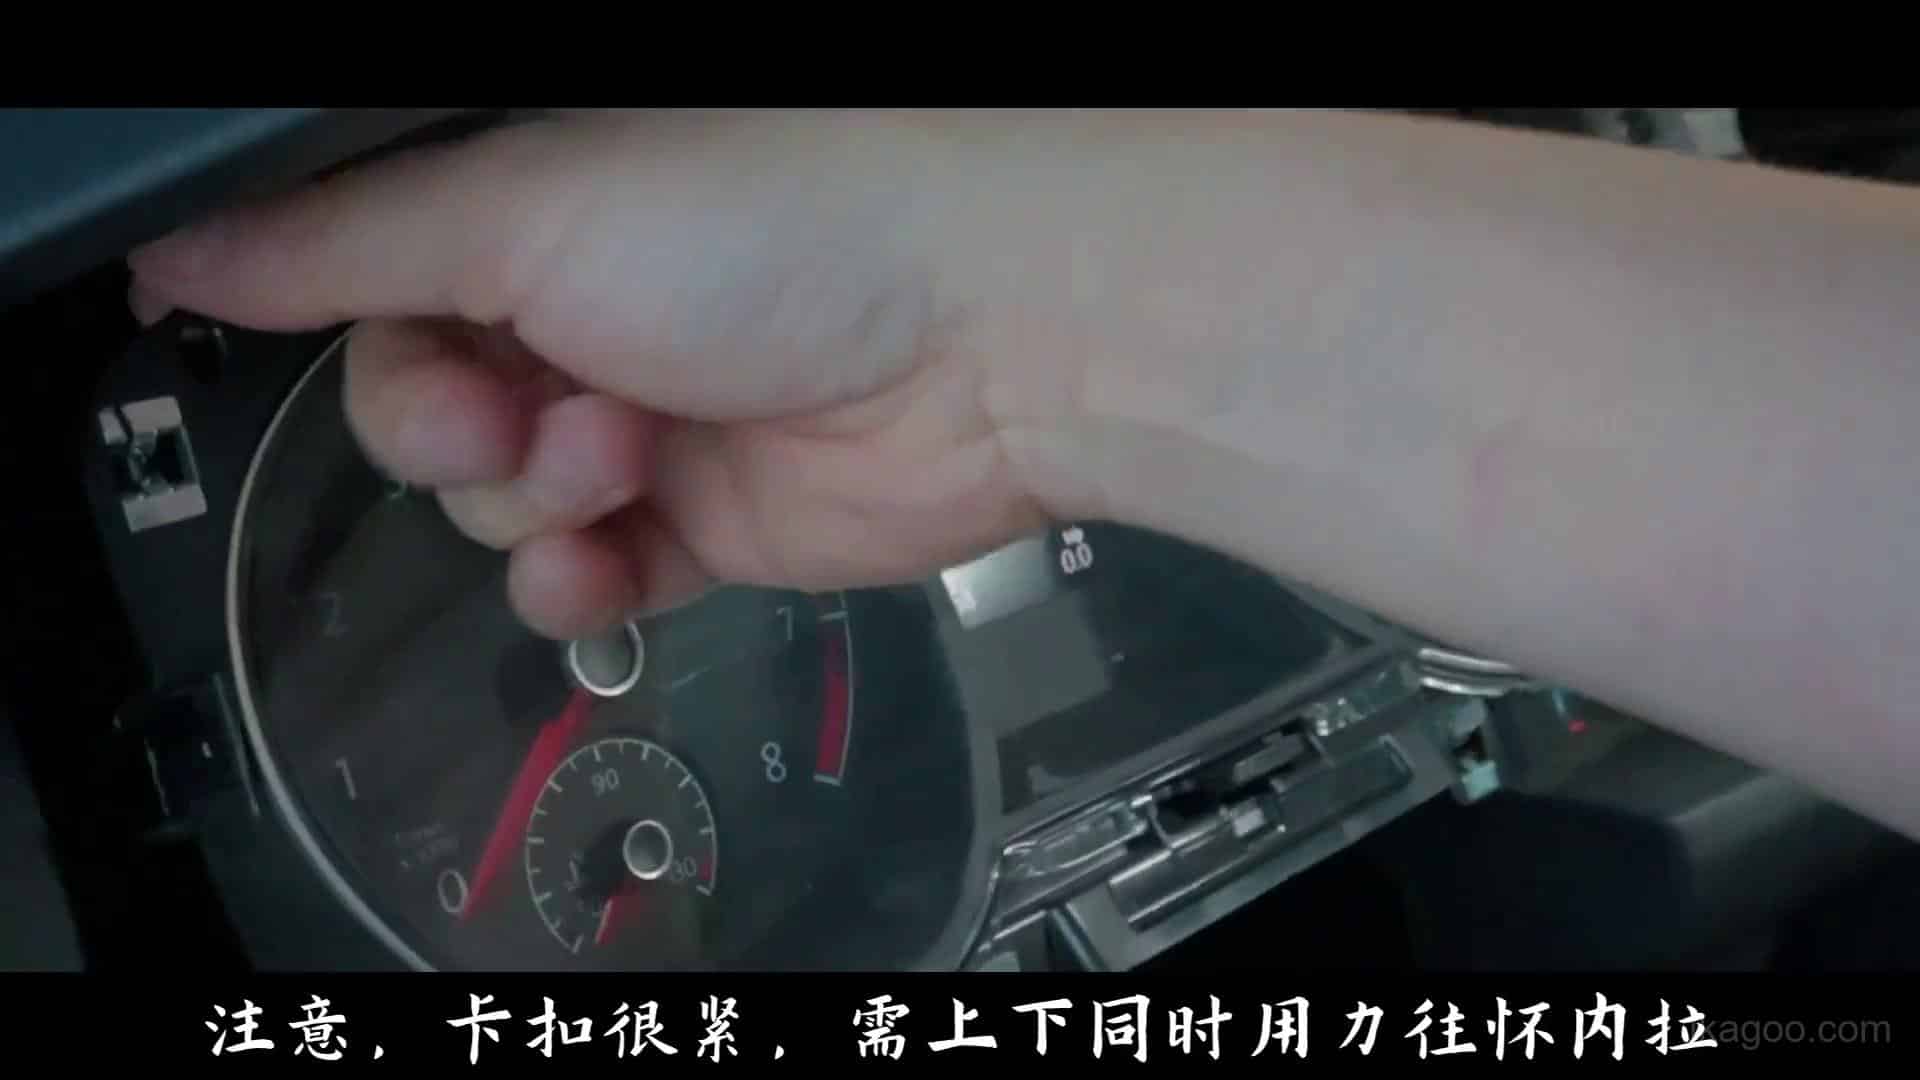
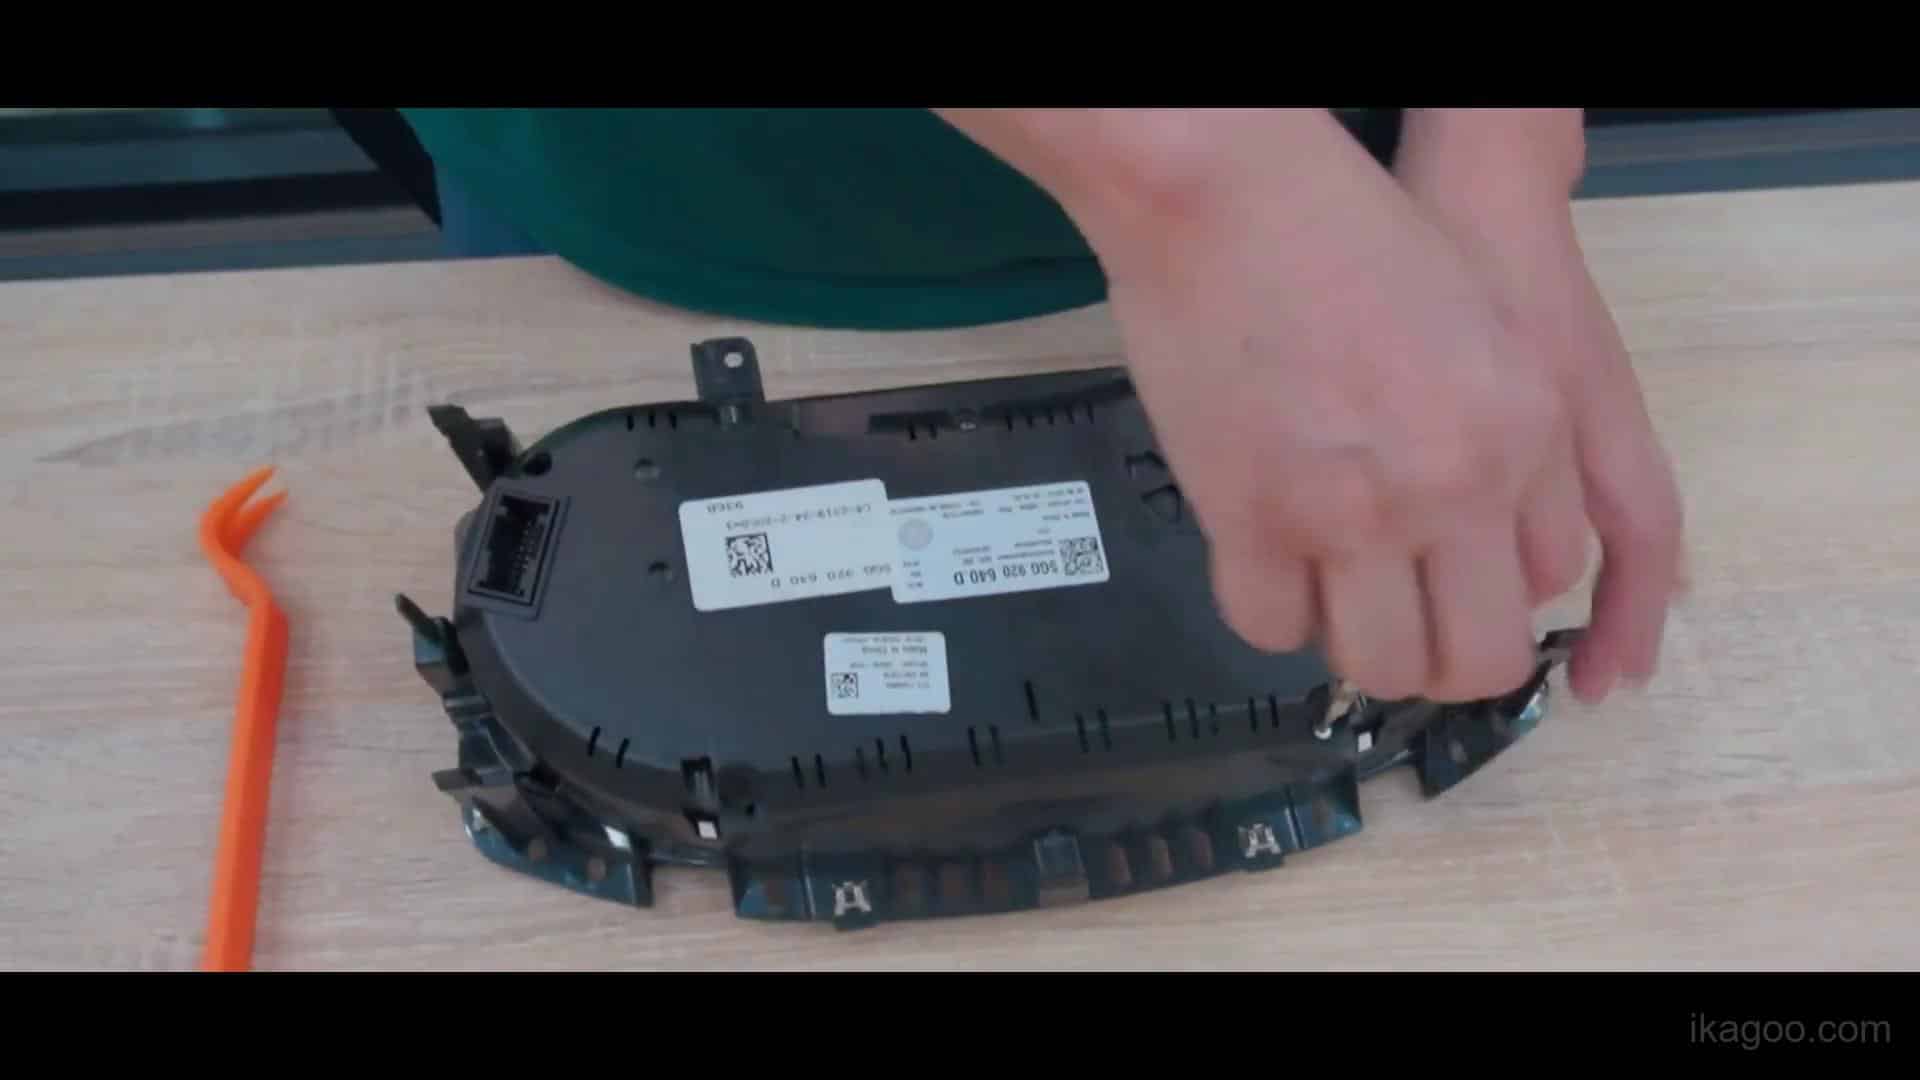
Abra la carcasa original del cuadro de instrumentos
Comience a soltar el embellecedor frontal y el marco decorativo. Sujete la carcasa por los bordes y descargue la electricidad estática antes de tocar los componentes electrónicos internos.
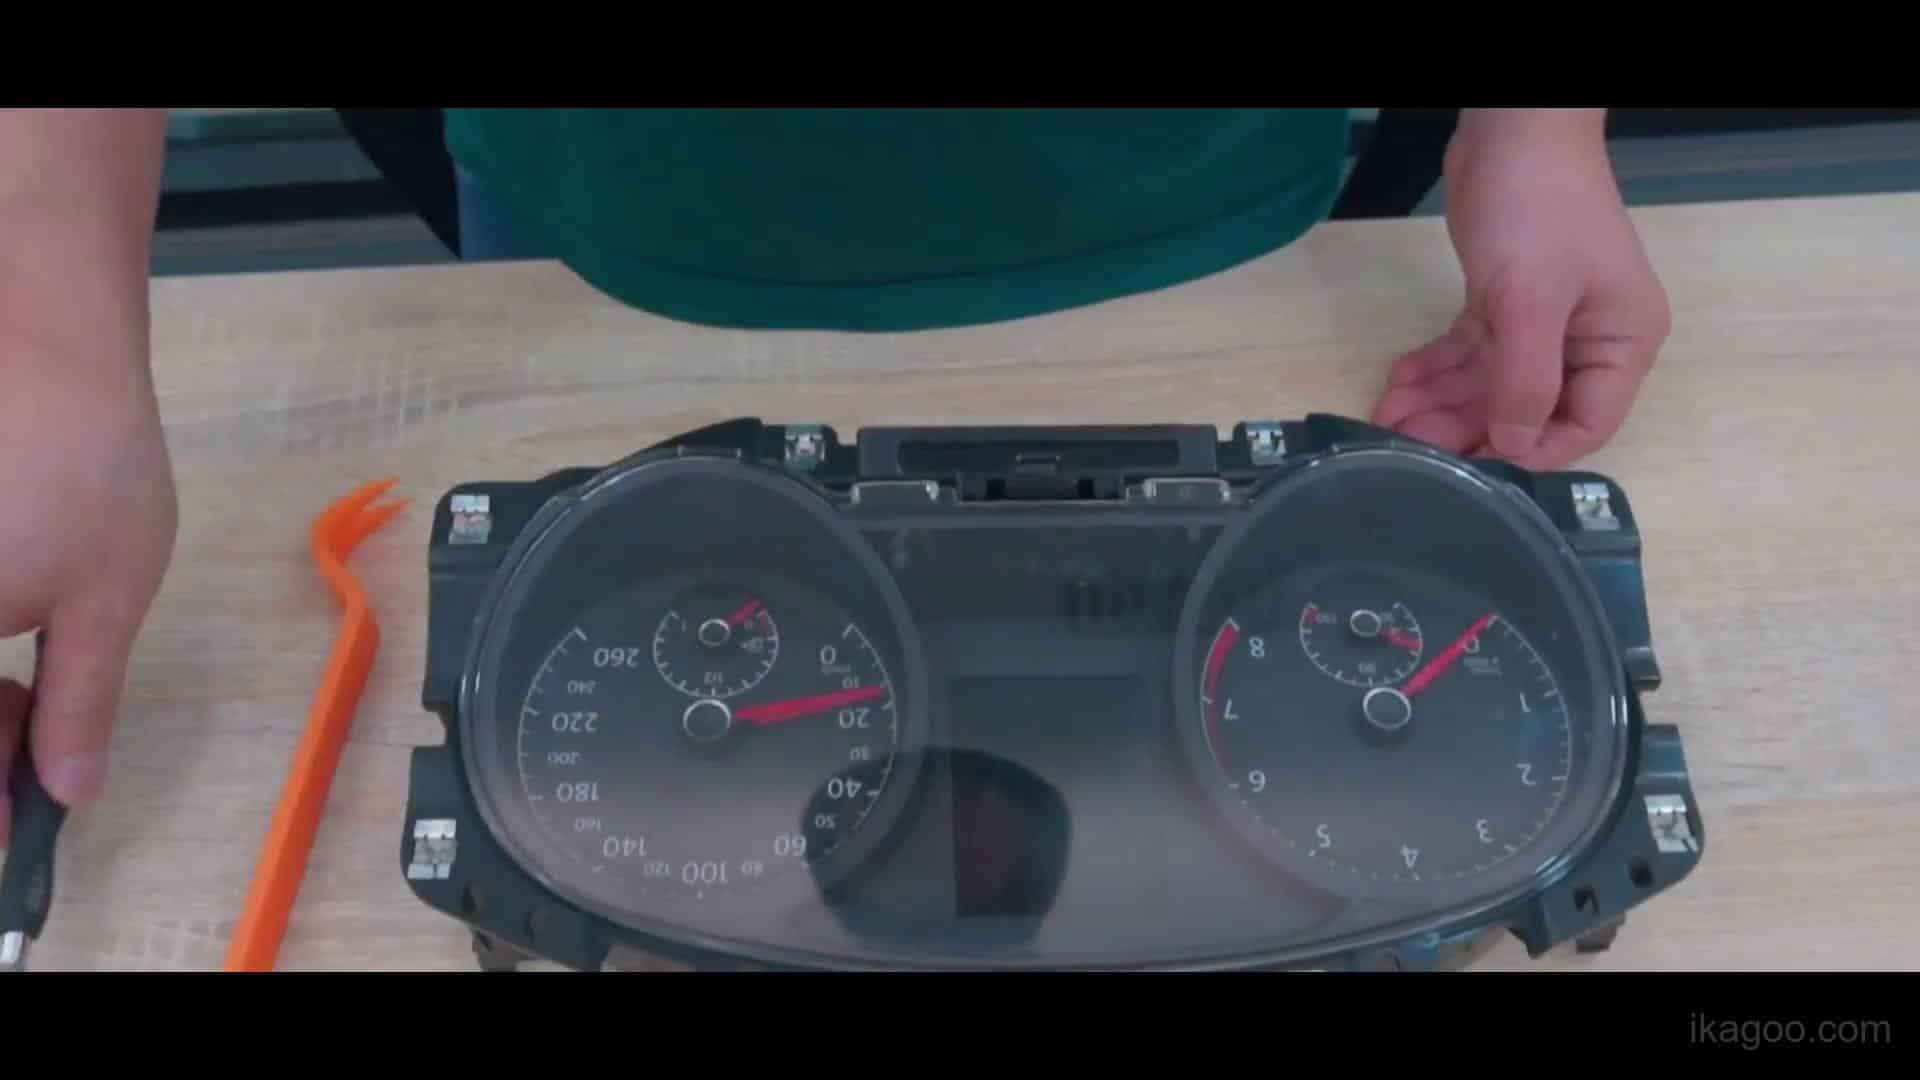
Continúe separando el panel frontal
Suelte las pestañas restantes con cuidado. Evite la presión brusca que pueda dañar los clips del embellecedor o las superficies visibles.
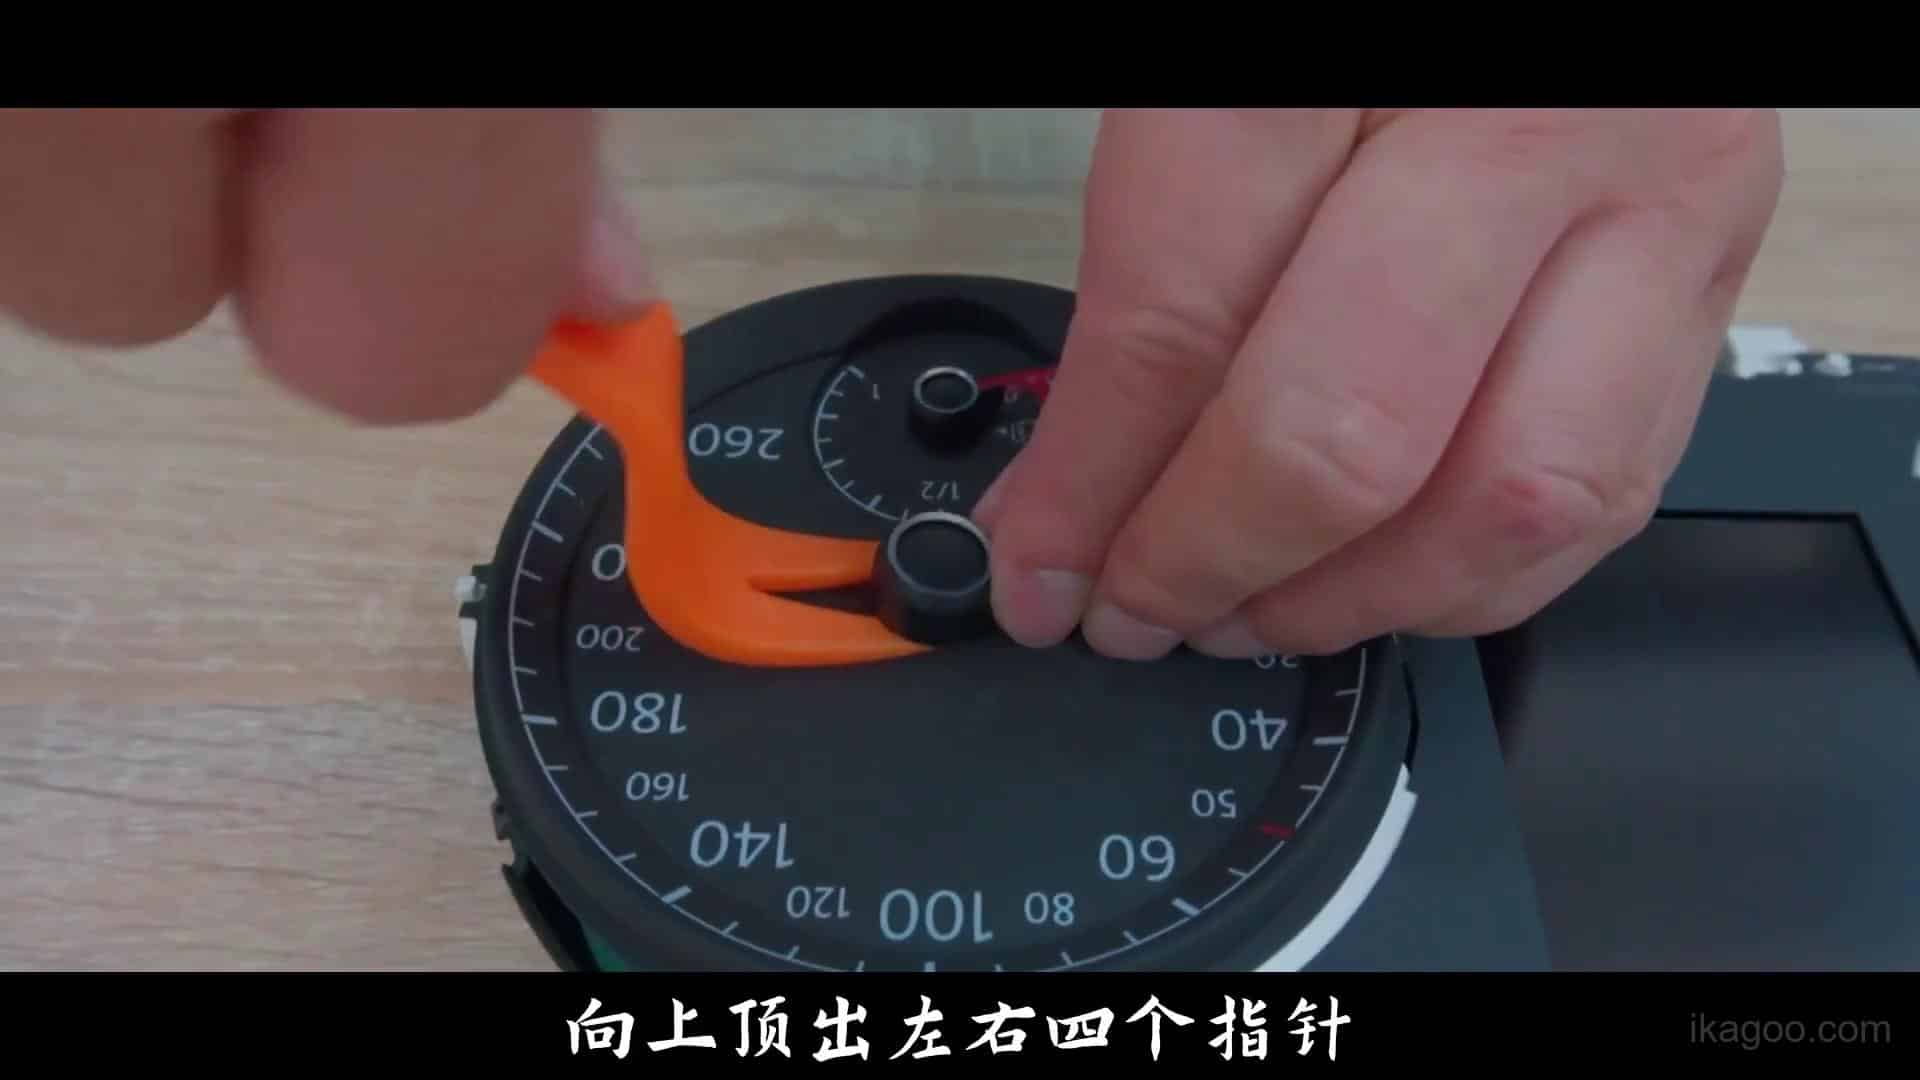
Retire las agujas originales con cuidado
Retire las agujas de manera uniforme y mantenga estable el hardware interno del indicador. Evite girar los ejes de forma agresiva.
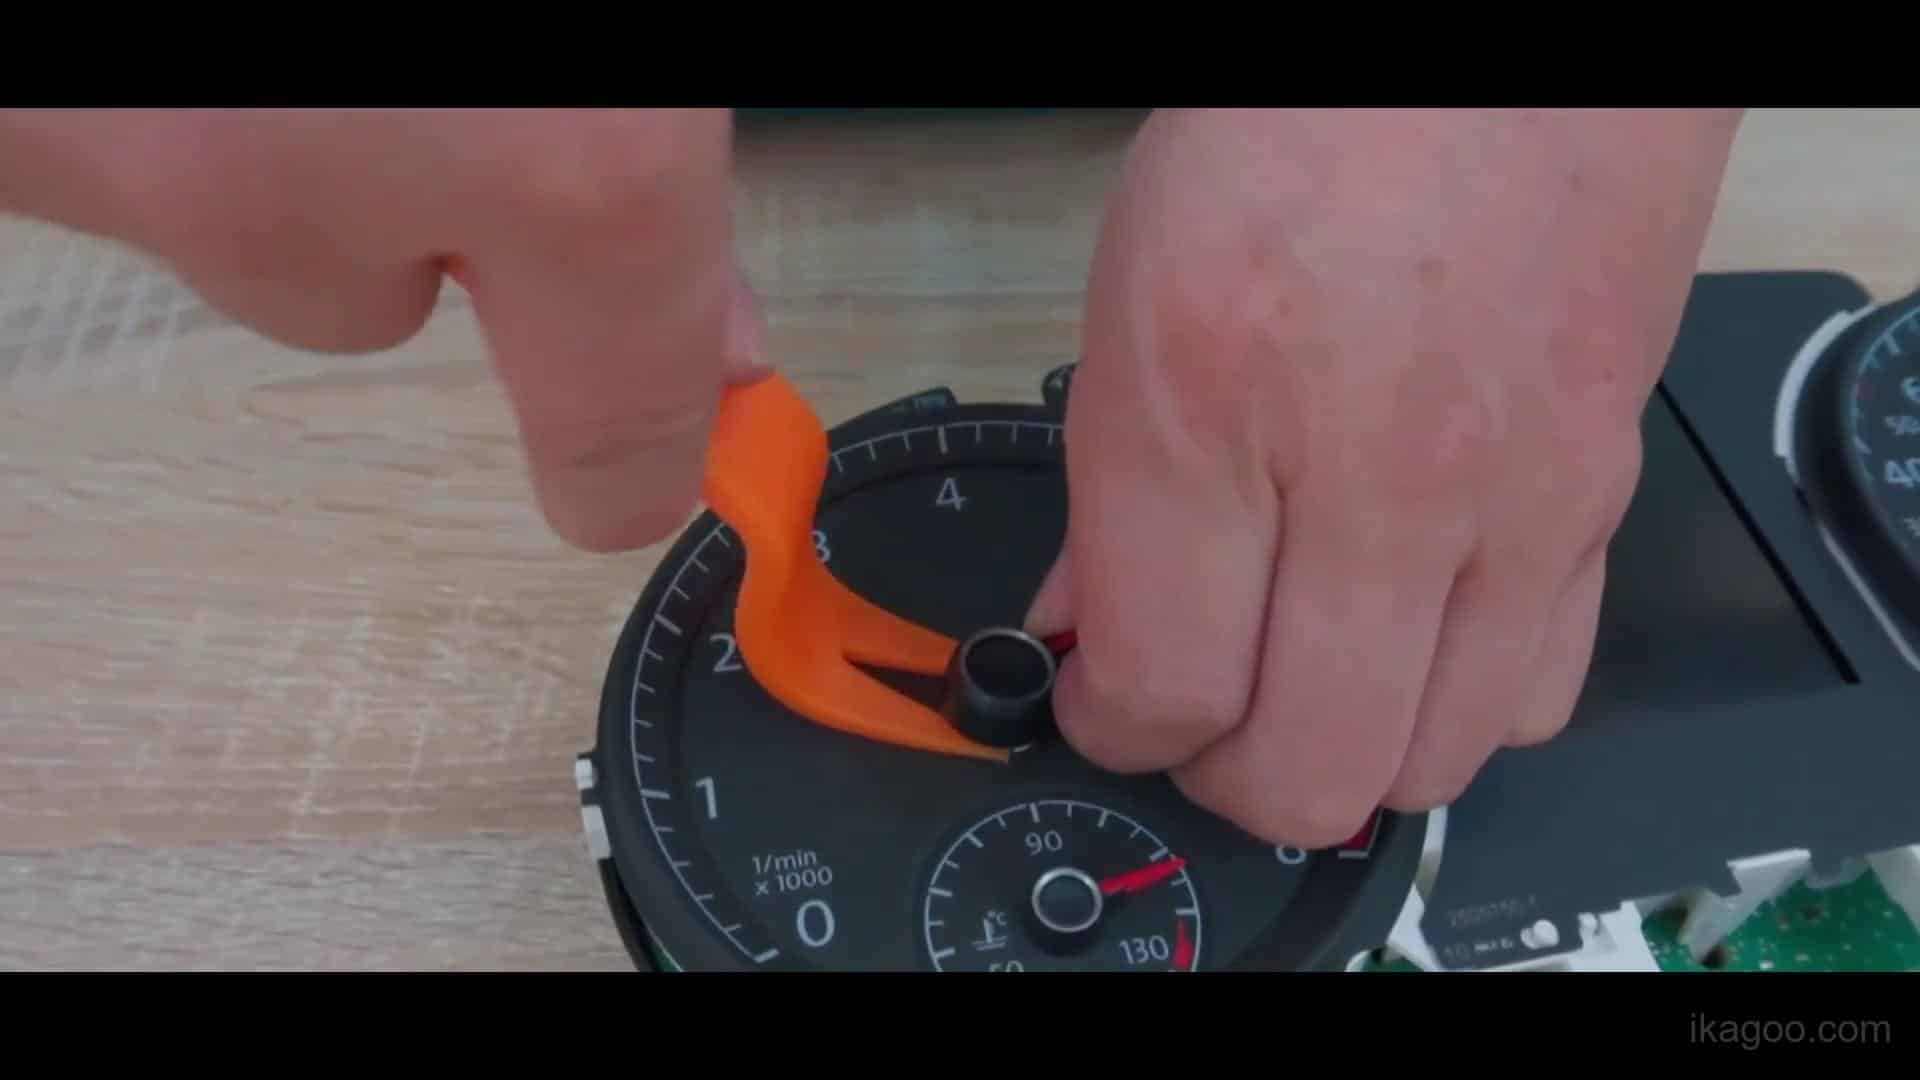
Finalice la etapa de extracción de las agujas
Mantenga limpia la superficie de trabajo y proteja los componentes mecánicos restantes antes de continuar con el traslado interno.
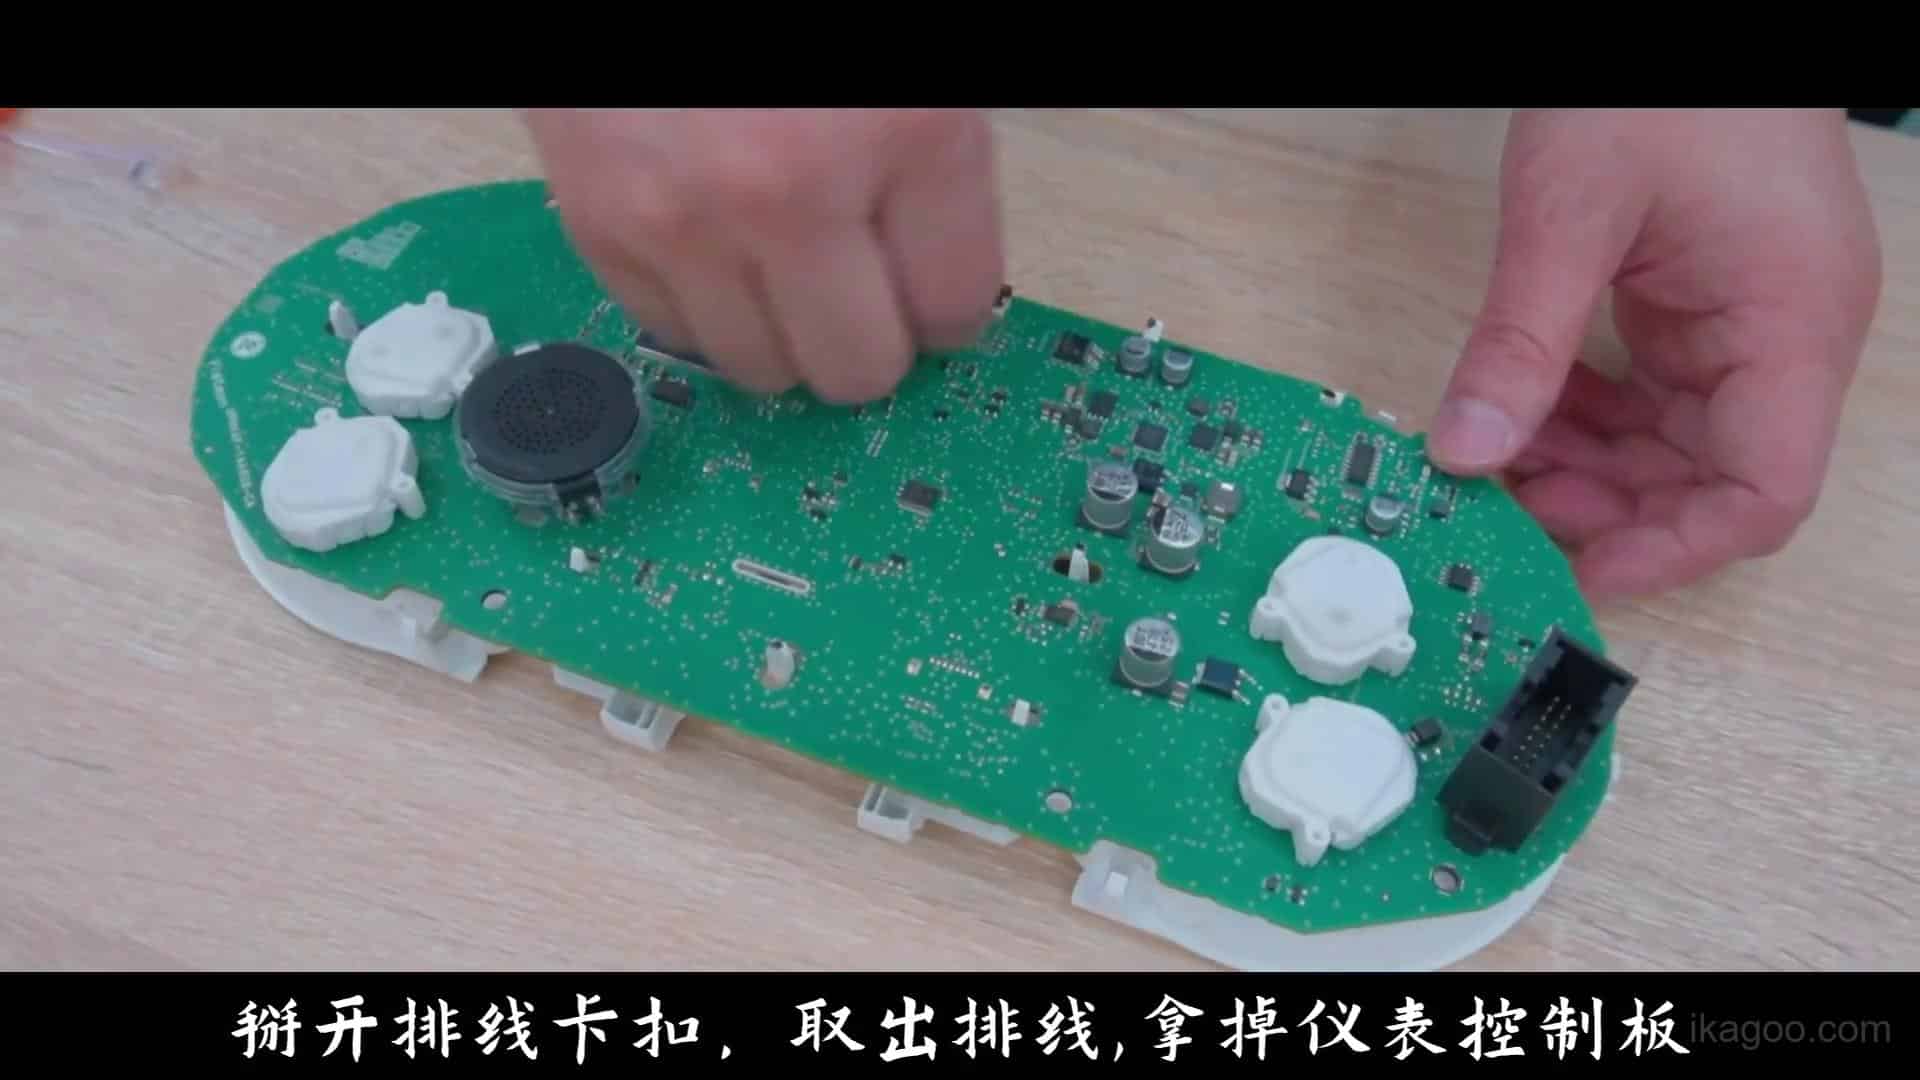
Desconecte el cable plano y la ruta de la placa
Manipule la PCB por sus bordes. No toque directamente los componentes electrónicos y no tire de las conexiones del cable plano en ángulo.
Suelte los puntos de retención internos y mantenga intacta la ruta del zumbador
Durante el traslado interno, asegúrese de que el zumbador o altavoz original y su ruta de montaje permanezcan correctamente instalados.
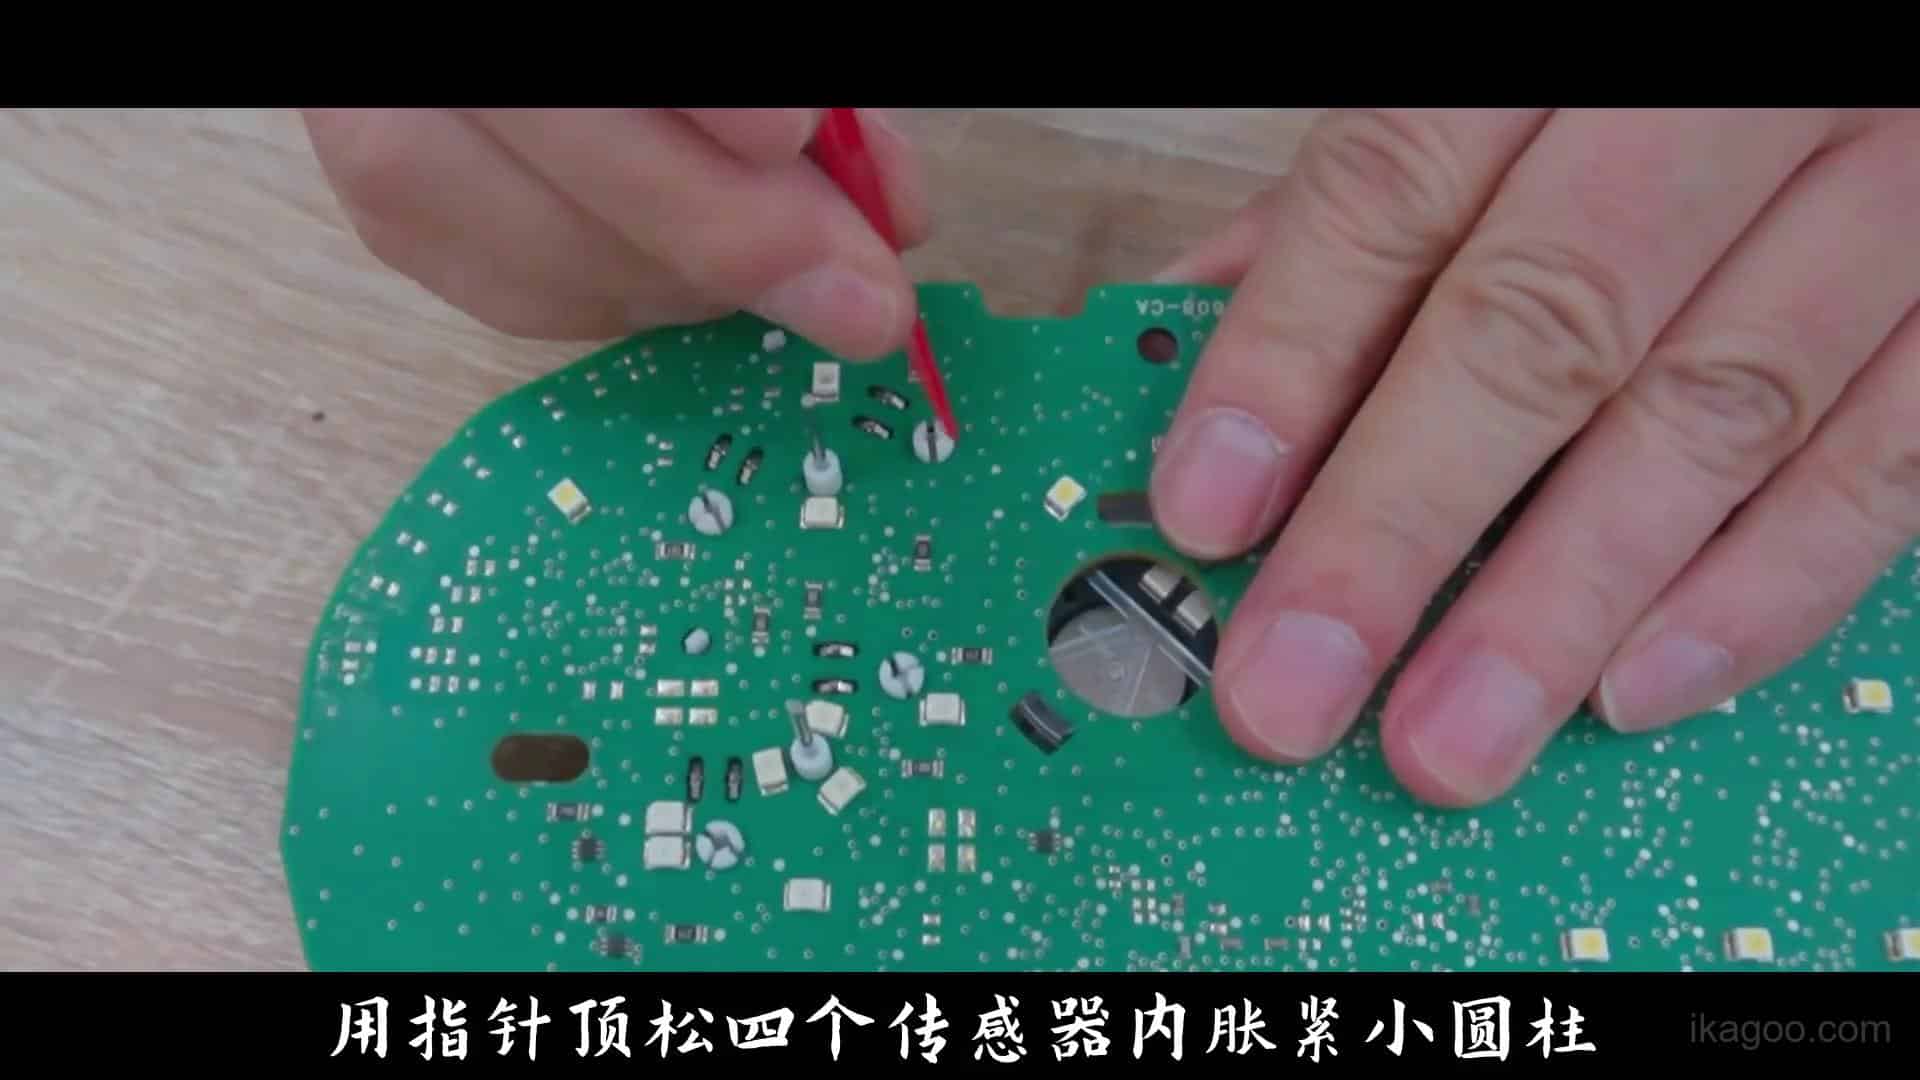
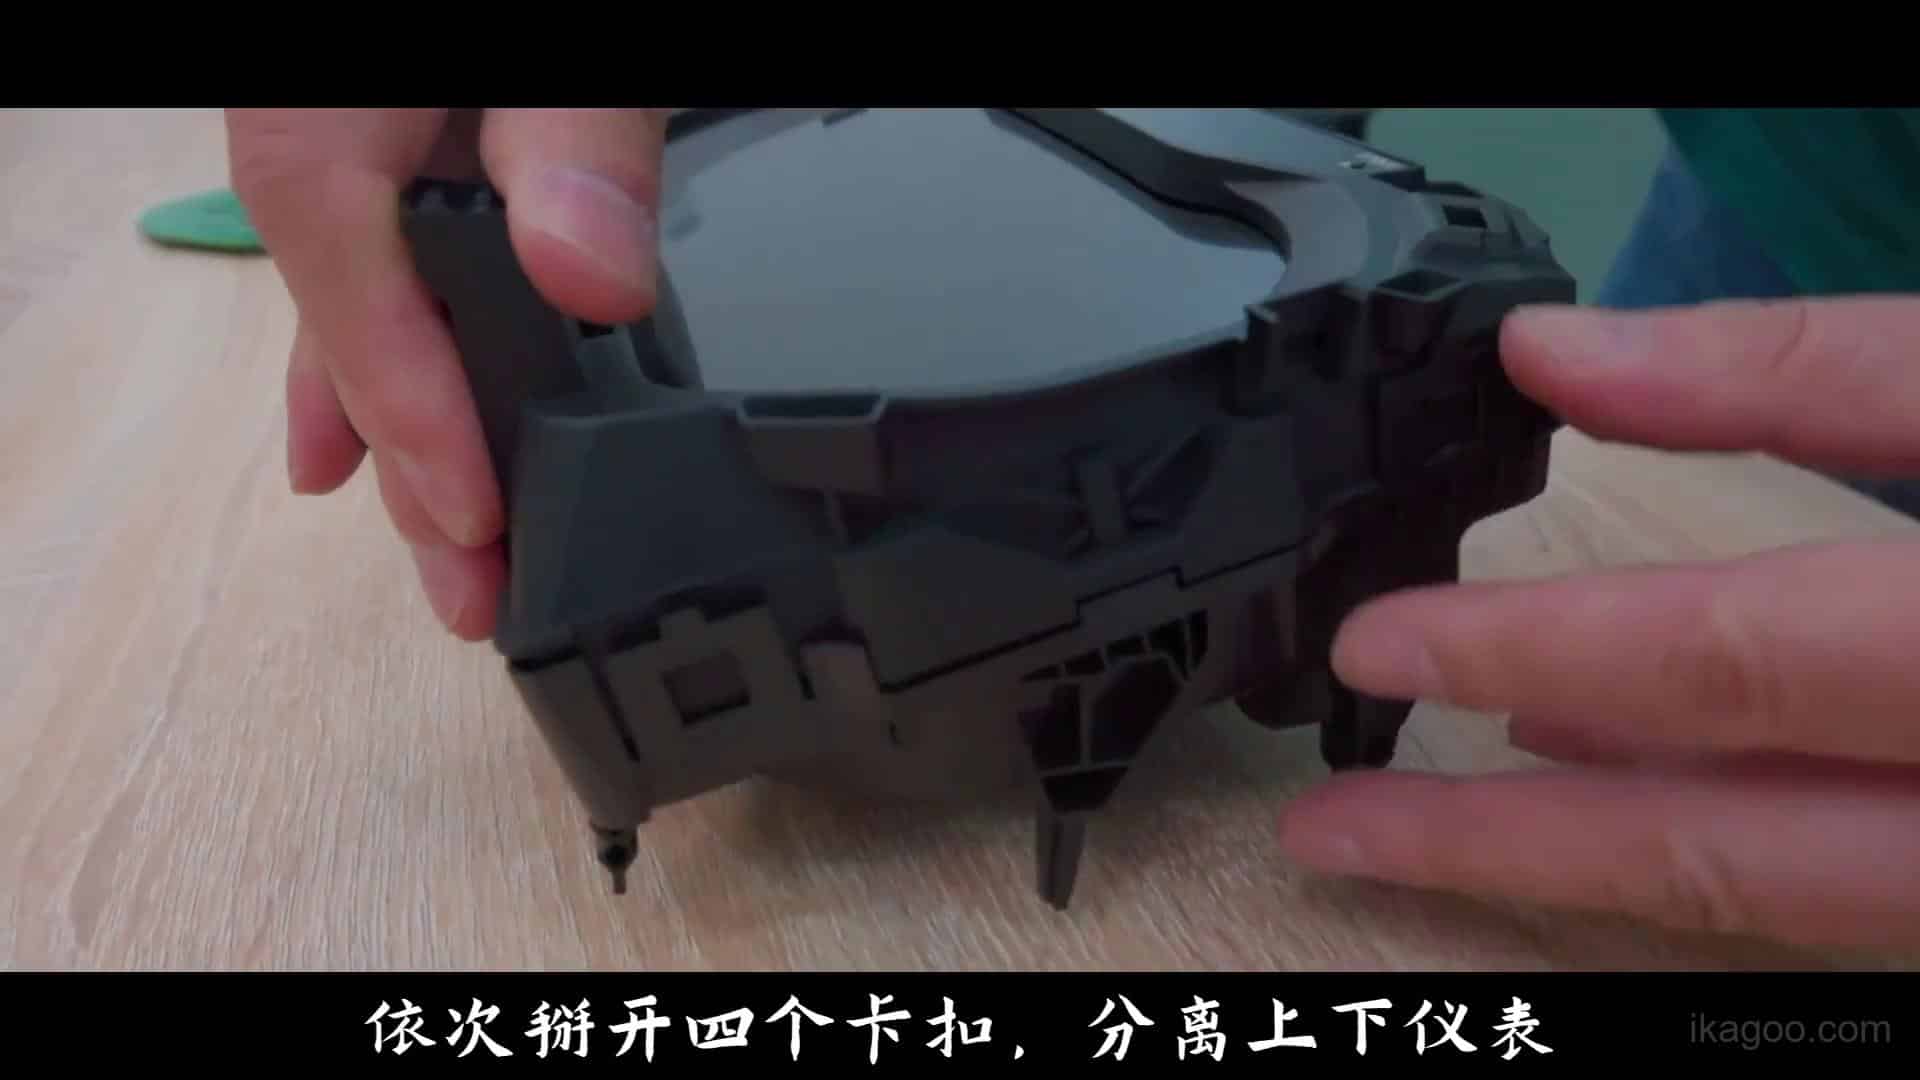
Separe y prepare las secciones de la carcasa
Con la carcasa abierta, confirme que los componentes originales requeridos y los puntos de montaje estén listos para el conjunto de cuadro digital mejorado.
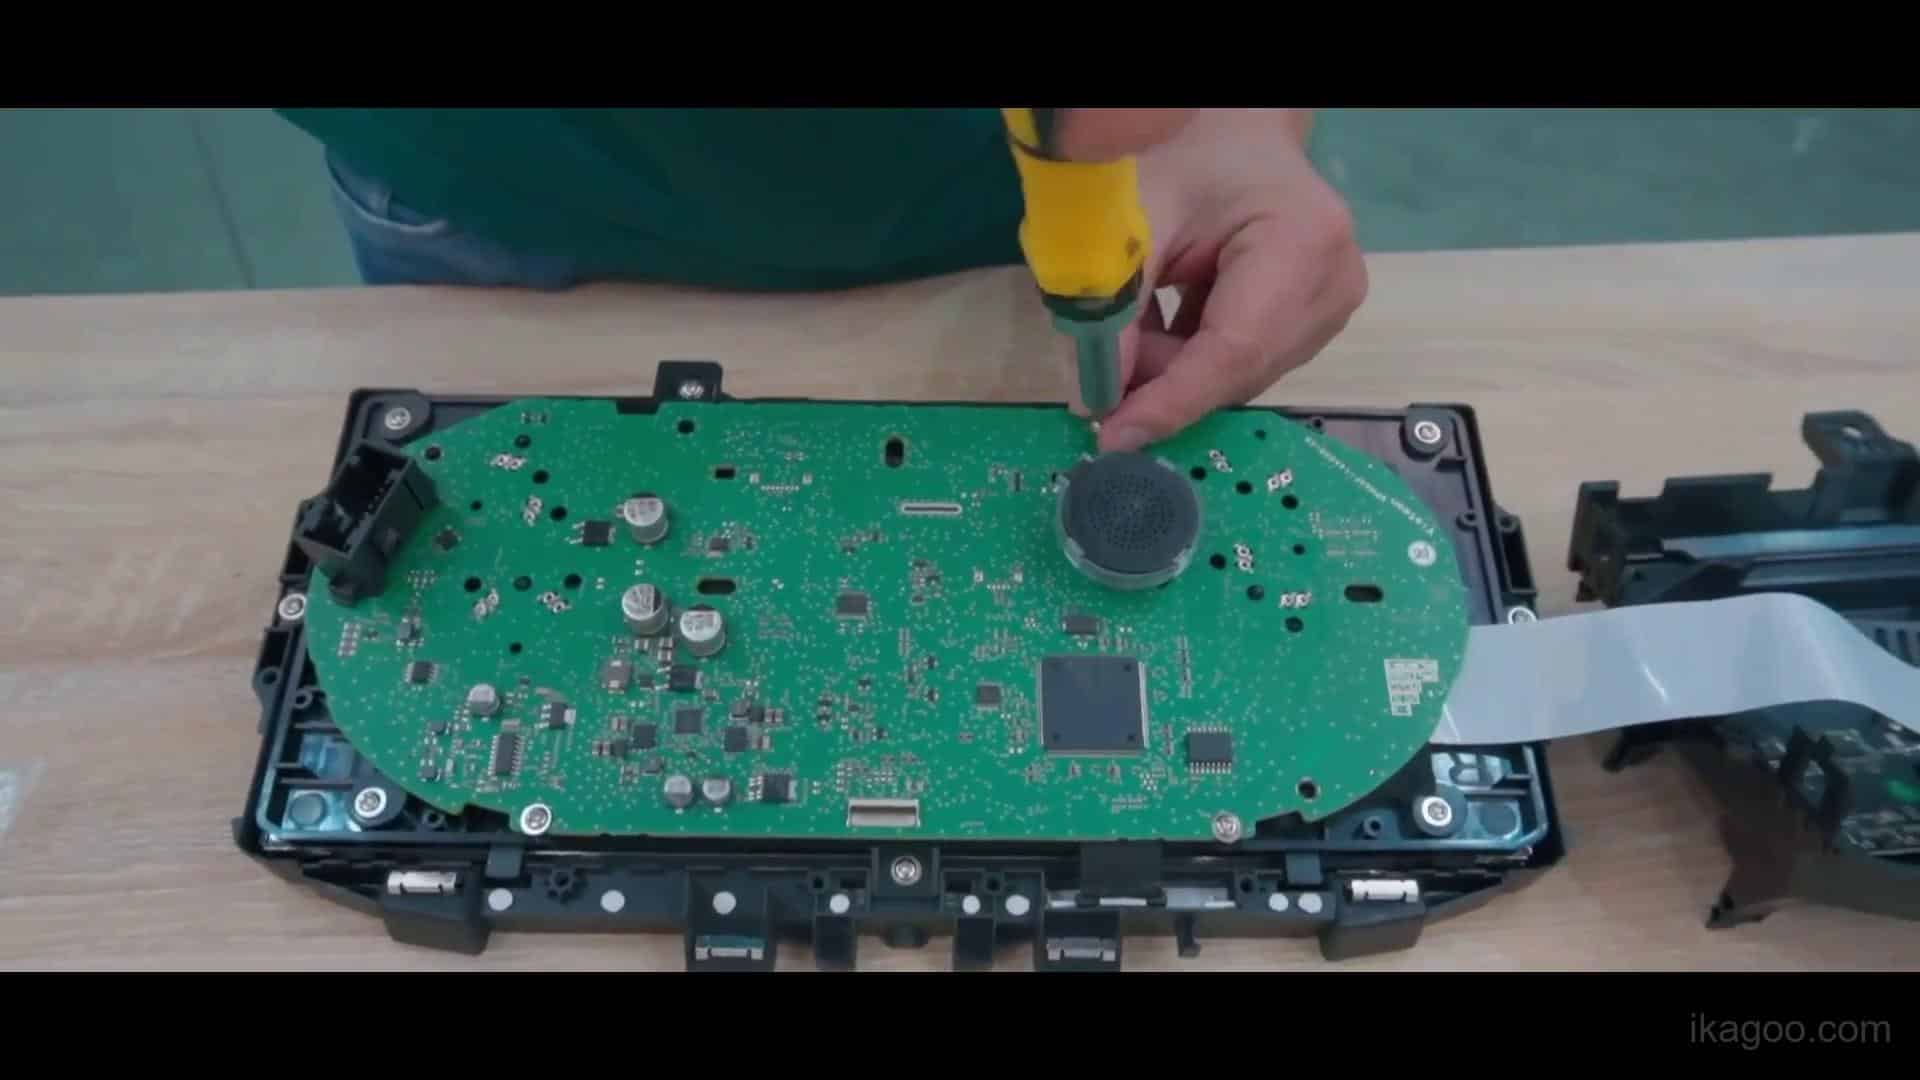
Fije la placa interna y cierre la carcasa de manera uniforme
Asegúrese de que la placa interna quede plana, los puntos de sujeción estén seguros, los cables planos no queden atrapados y la carcasa cierre de manera uniforme sin presión sobre la pantalla LCD.
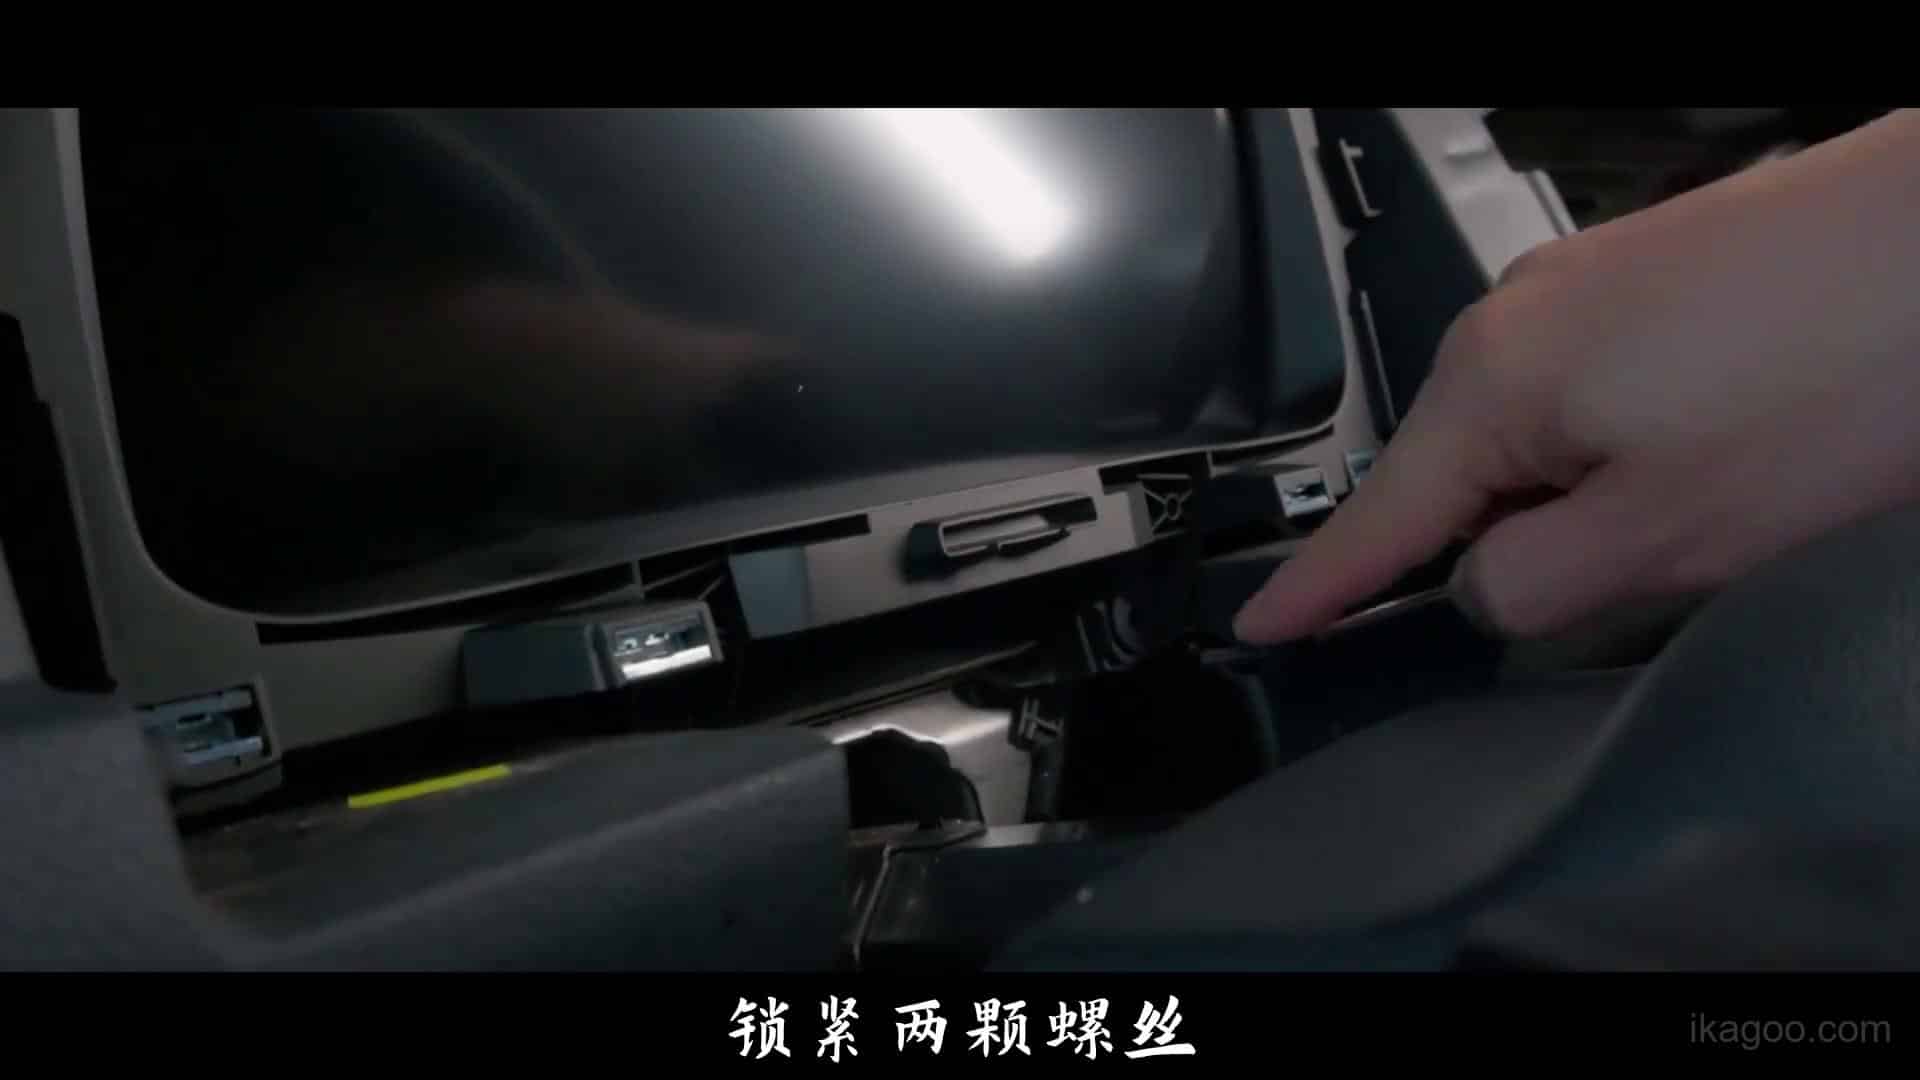
Vuelva a conectar el cuadro y complete la comprobación del primer arranque
Vuelva a conectar el cableado, reinstale el cuadro de instrumentos en el salpicadero y encienda el vehículo antes de cerrar todos los embellecedores del salpicadero.
Confirme el arranque, los indicadores de advertencia, los controles del volante, la respuesta del menú y la visualización de los datos del vehículo antes de completar la instalación.
Comprobaciones de primer arranque y posteriores a la instalación
Una pantalla de arranque normal por sí sola no demuestra que la instalación del cuadro digital del Golf Mk7 esté completa. Compruebe los datos del vehículo y la instalación física antes del uso normal en carretera.
Comprobaciones del lado del vehículo
- Los indicadores de advertencia y los avisos se muestran correctamente.
- La velocidad, el combustible, la temperatura y los datos compatibles del vehículo aparecen con normalidad.
- Los controles del volante responden correctamente.
- Se puede acceder con normalidad a los ajustes de idioma y unidades.
- El cuadro queda a ras en el salpicadero.
- Los embellecedores circundantes se alinean correctamente.
Comprobaciones de pantalla y hardware
- La pantalla arranca de forma constante.
- No se ven líneas anómalas ni zonas muertas en la pantalla.
- No aparecen marcas de presión en el panel LCD.
- Ningún cable plano ni conector queda atrapado dentro de la carcasa.
- La placa interna transferida está fijada correctamente.
- El zumbador o altavoz original permanece instalado.
Cómo controlar los menús del cuadro
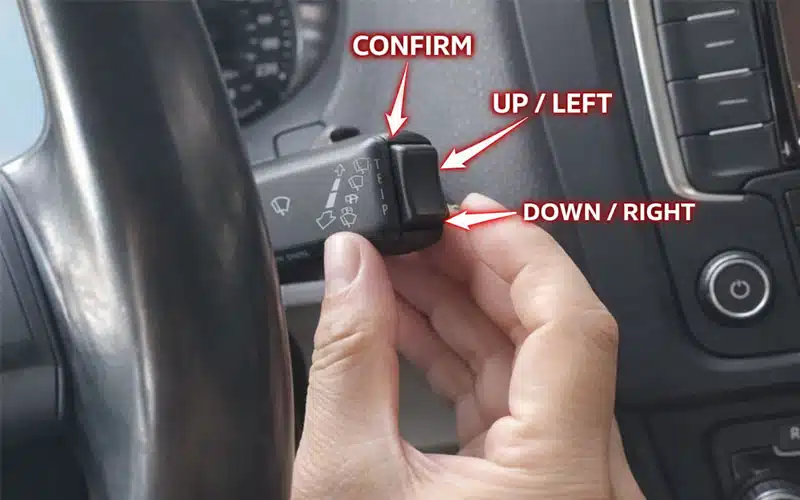
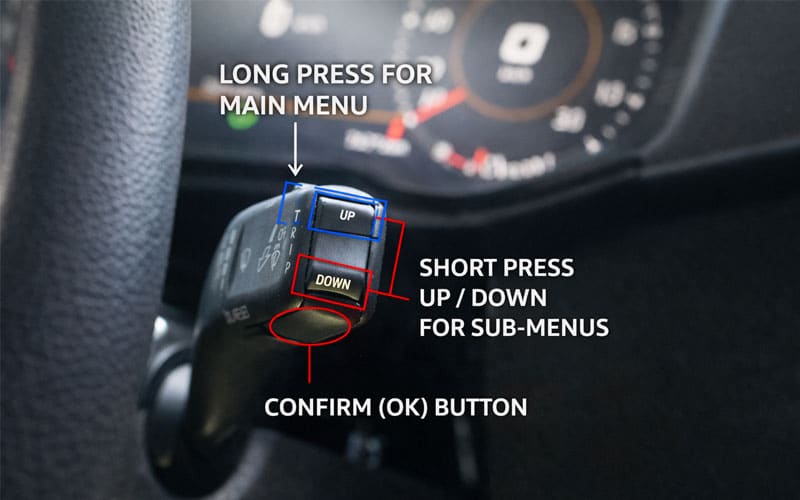
Estas imágenes de referencia de control muestran la lógica estándar de control de menús utilizada en los cuadros de instrumentos digitales basados en Linux de Volkswagen y Audi iKAGOO compatibles.
Referencia de control 01
Utilice los controles de la columna de dirección o del volante para desplazarse por los elementos del menú y confirmar la función seleccionada.
Referencia de control 02
Mantenga pulsado para entrar en el menú principal, use pulsaciones cortas para desplazarse por los submenús y confirme con el control OK.
Compatibilidad de firmware y actualizaciones
El comportamiento de la visualización del teléfono, la proyección y la actualización de firmware puede variar según la versión exacta del cuadro digital. No asuma que todos los cuadros del Golf Mk7 utilizan la misma ruta de actualización o conexión de teléfono.
Para los cuadros de instrumentos digitales de Volkswagen y Audi iKAGOO compatibles, utilice la documentación de actualización específica después de confirmar la versión instalada.
Recursos relacionados de iKAGOO
Cuadro digital Golf Mk7 / Mk7.5
Revisa la ruta de hardware exacta del Golf Mk7 y compara la conversión compatible con el cuadro de instrumentos original antes de hacer el pedido.
Ver cuadro digital Golf Mk7 / Mk7.5Colección de cuadros digitales Volkswagen
Usa la colección de Volkswagen al comparar las mejoras de cuadros de instrumentos digitales del Golf, Tiguan, Passat y otros Volkswagen.
Explorar cuadros digitales VolkswagenManual de Usuario del Cuadro Digital VW y Audi
Usa el manual del propietario para la configuración de menús, la lógica de funcionamiento y la guía compatible posterior a la instalación.
Abrir el manual de usuario del cuadro digital VW y AudiDirectorio de Guías de Instalación
Encuentra tutoriales de instalación adicionales específicos para cada vehículo publicados por iKAGOO.
Consultar las guías de instalaciónFAQ: Instalación del cuadro digital Golf Mk7 / Mk7.5
¿Esta guía de instalación se aplica a todos los Golf Mk7?
No. La ruta de instalación correcta depende de la arquitectura del cuadro de instrumentos original. Esta guía es específicamente para la ruta de conversión compatible de cuadro analógico MQB.
¿Cubre Golf Mk7.5, GTI, GTE, R-Line y Golf R?
Puede cubrir estas variantes cuando la arquitectura del cuadro original coincida con la ruta de conversión compatible de cuadro analógico. Confirma el salpicadero y el cuadro de instrumentos originales antes de hacer el pedido.
¿La instalación estándar requiere taladrar o cortar cables?
No. La ruta estándar compatible no requiere taladrar ni cortar cables.
¿La instalación del cuadro digital del Golf Mk7 requiere flashear o codificar la ECU?
No se requiere flashear ni codificar la ECU en la ruta de instalación estándar compatible descrita en esta guía.
¿Qué se debe comprobar antes de cerrar el salpicadero?
Confirma el comportamiento normal de arranque, los indicadores de advertencia, los controles del volante, la respuesta del menú, la visualización de datos del vehículo, el ajuste de la placa interna, la retención del zumbador y la alineación final del salpicadero.
¿Y si el Golf ya tiene un cockpit digital de fábrica?
No sigas esta ruta de conversión de cuadro analógico. Confirma el producto y la ruta de instalación correctos antes del desmontaje.








Add comment
Lo siento, debes estar conectado para publicar un comentario.